We’ve all experienced that feeling~ you want to give someone special, well, something special. You think, you scour the internet, and maybe even go out and browse some shops, but still you come up empty handed. My friend, you are in luck because even though it isn’t the most original idea (a quick search on Pinterest will reveal that,) it is a really easy but wonderful gift that will make anyone receiving it feel loved. So, what is it?
Ever thought of giving a gift basket? I know what you are thinking… Really? What is so special about a gift basket? And your right, if you read the million other gift basket posts they have the “easy” part down to a science….”pick a theme, buy the stuff, and throw it in a basket” And that is a very good gift, but the key to making it special is to make it PERSONAL! How? You ask. Let me tell you. Consider who your recipient is and what they love, then pick your theme and build your basket!
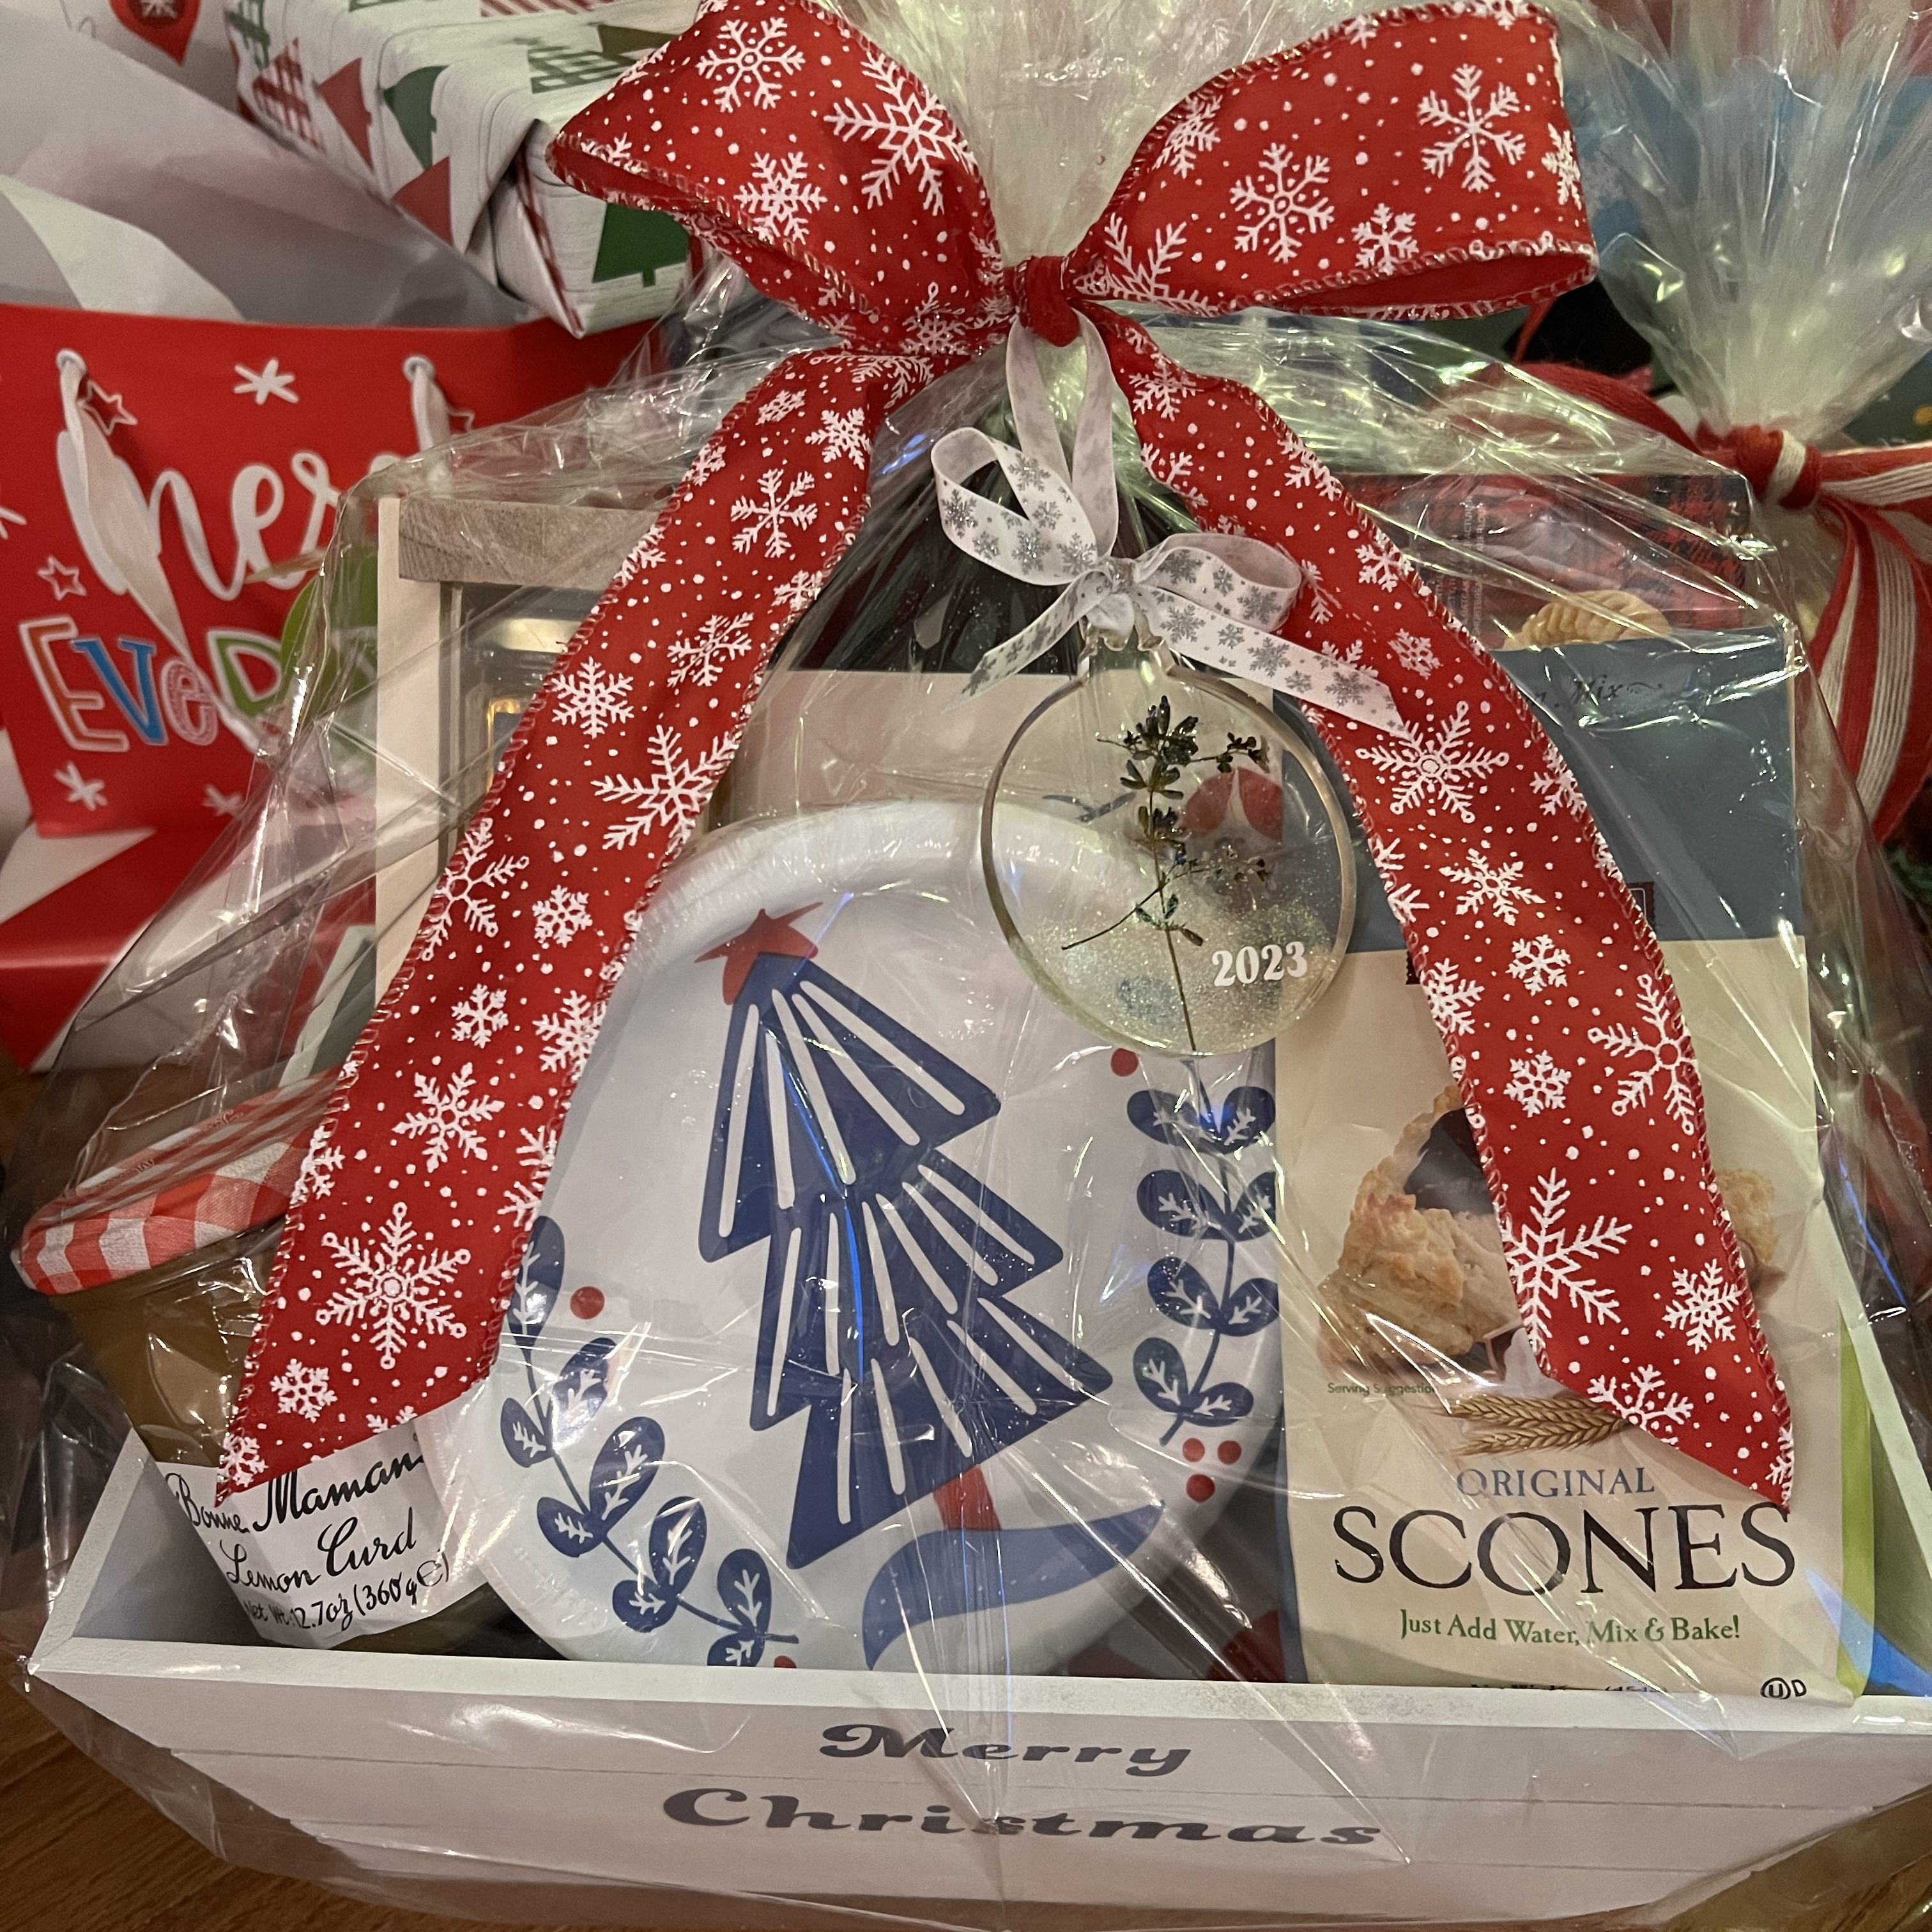
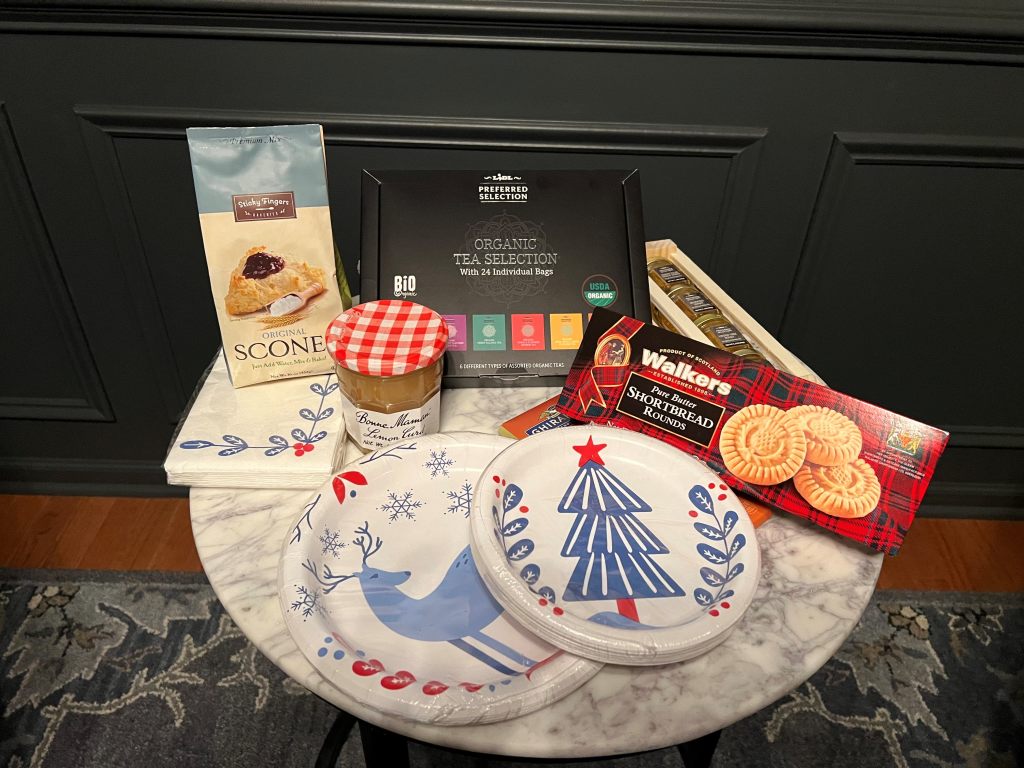
Our amazing friends happen to live just across the street- how blessed are we? Here are the items I found for their basket. I chose a theme, “Tea time” but I needed to make it PERSONAL! Her favorite color is blue. I was so excited to find these blue Christmas plates at Target. Also, I knew her parents were visiting from Holland and they enjoy having tea together. These cute little honey jars and tea sampler are from Lidl! I thought they may also enjoy some scones and I had great intentions of making some homemade, but when I spotted this mix at World Market I was convinced that it was a sign I didn’t need to add to my long list of Christmas baking. Lastly, I added some Bonne Maman lemon curd and a chocolate bar. The wooden basket was from the getcha area (that’s what I call it) in the front area of Target. I wrapped the entire basket in a large clear plastic gift bag from Michaels and added the finishing touch- a bow and a pressed flower resin ornament my middle son and I made. All in, this gift was $45!
I think it checked all of the right boxes- easy, cost effective, and SPECIAL! I can’t wait to hear what she and her family think when they open it!
Time to make your basket! Merry Christmas!
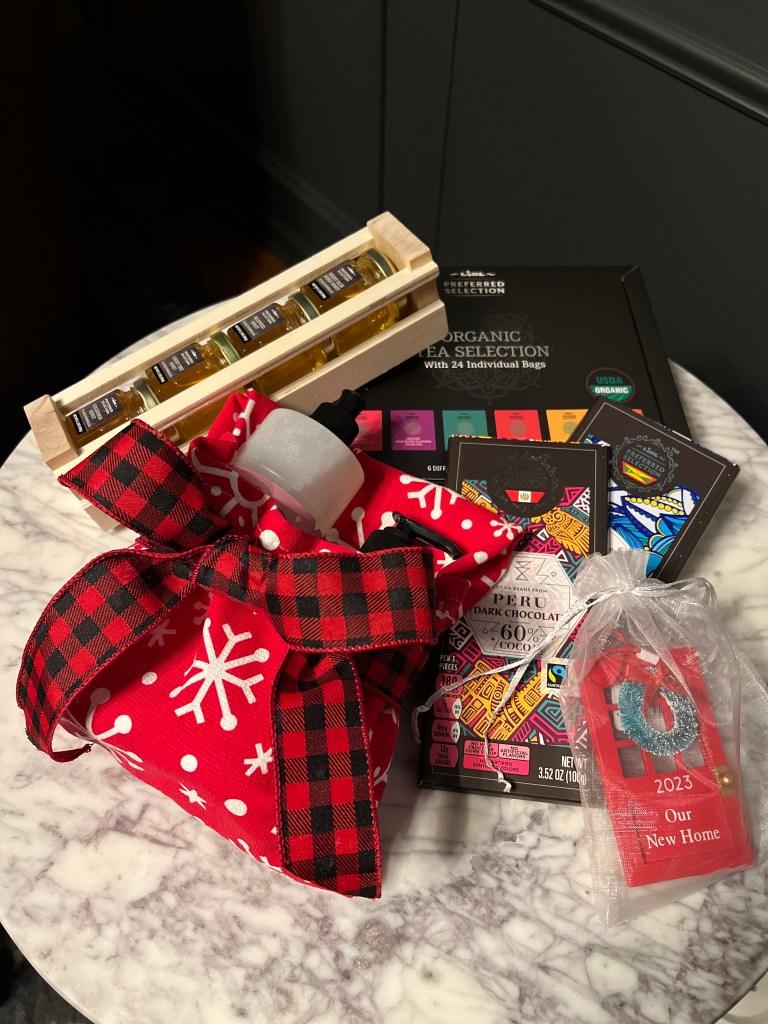
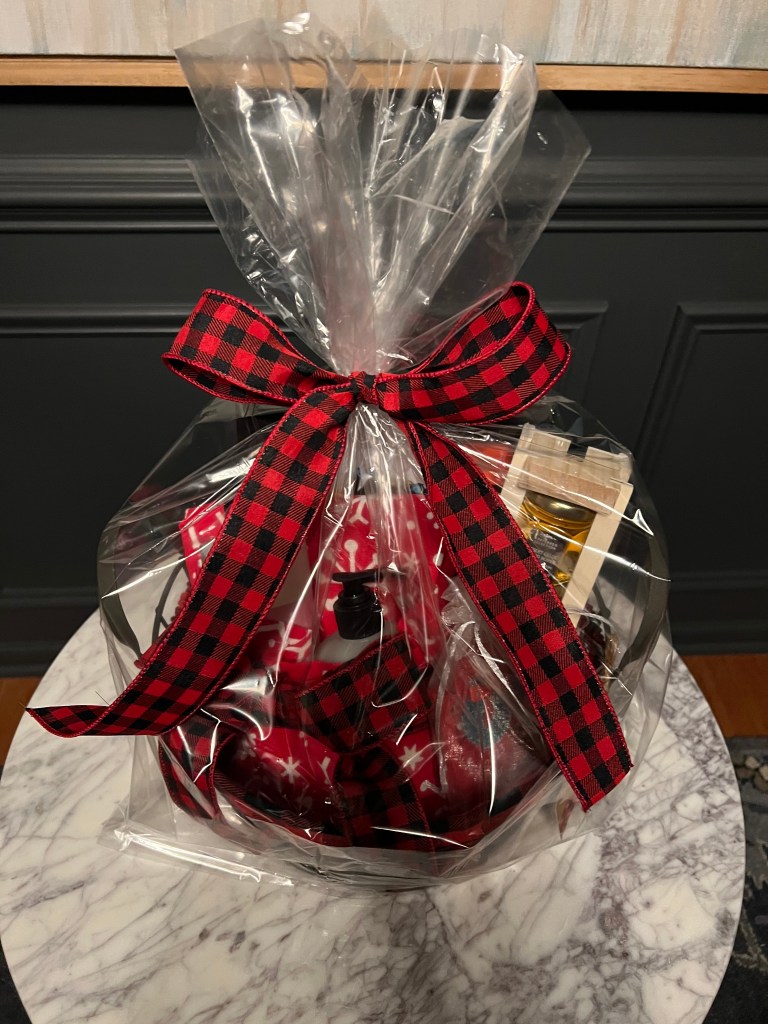
This gift basket is for my Mom. I didn’t pick a specific theme for this one. I included items I knew she would love and could enjoy in her new home. The red door ornament is from Target but I personalized it by adding “Our New Home” (I used my Cricut Joy! (I just love that little machine) I found a neat little way to fold a Christmas dish towel on Pinterest and put in some peppermint scented Mrs. Meyer’s soap.
Hello friends! Time for Perfect Pantry “BeReal” edition! I’m not sure if that’s still a thing or not and since I’m cheugy according to the teenagers in my house, I should probably just lowkey call this post an update and move on- Bet!
Three years later, I’m happy with it! It has evolved for sure, and also appears to have become more of a storage area (ahem see top shelf) for the plethora of water bottles we own (do they multiply? Why do I have so many? Are they taking the place of all the coffee cups I purged-oh no!) My perfect pantry can be your perfect pantry too! Snag the materials list below for just a buck and you are on your way to the pantry of your dreams!
I know you need something to do this weekend, you’re welcome 😉
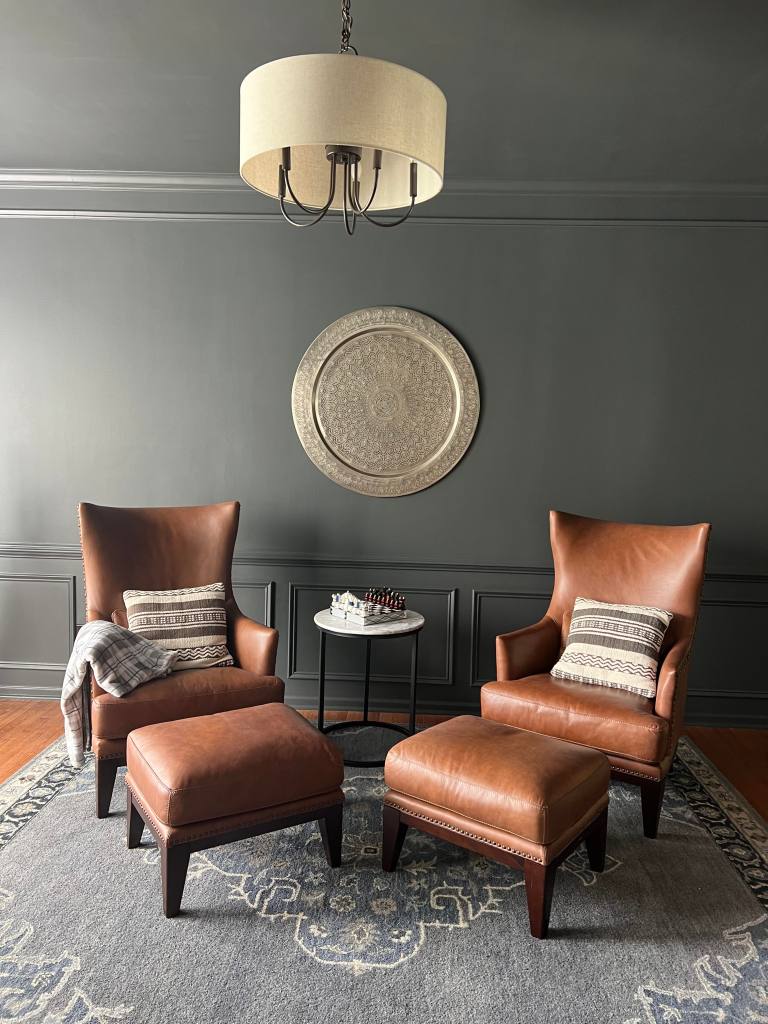
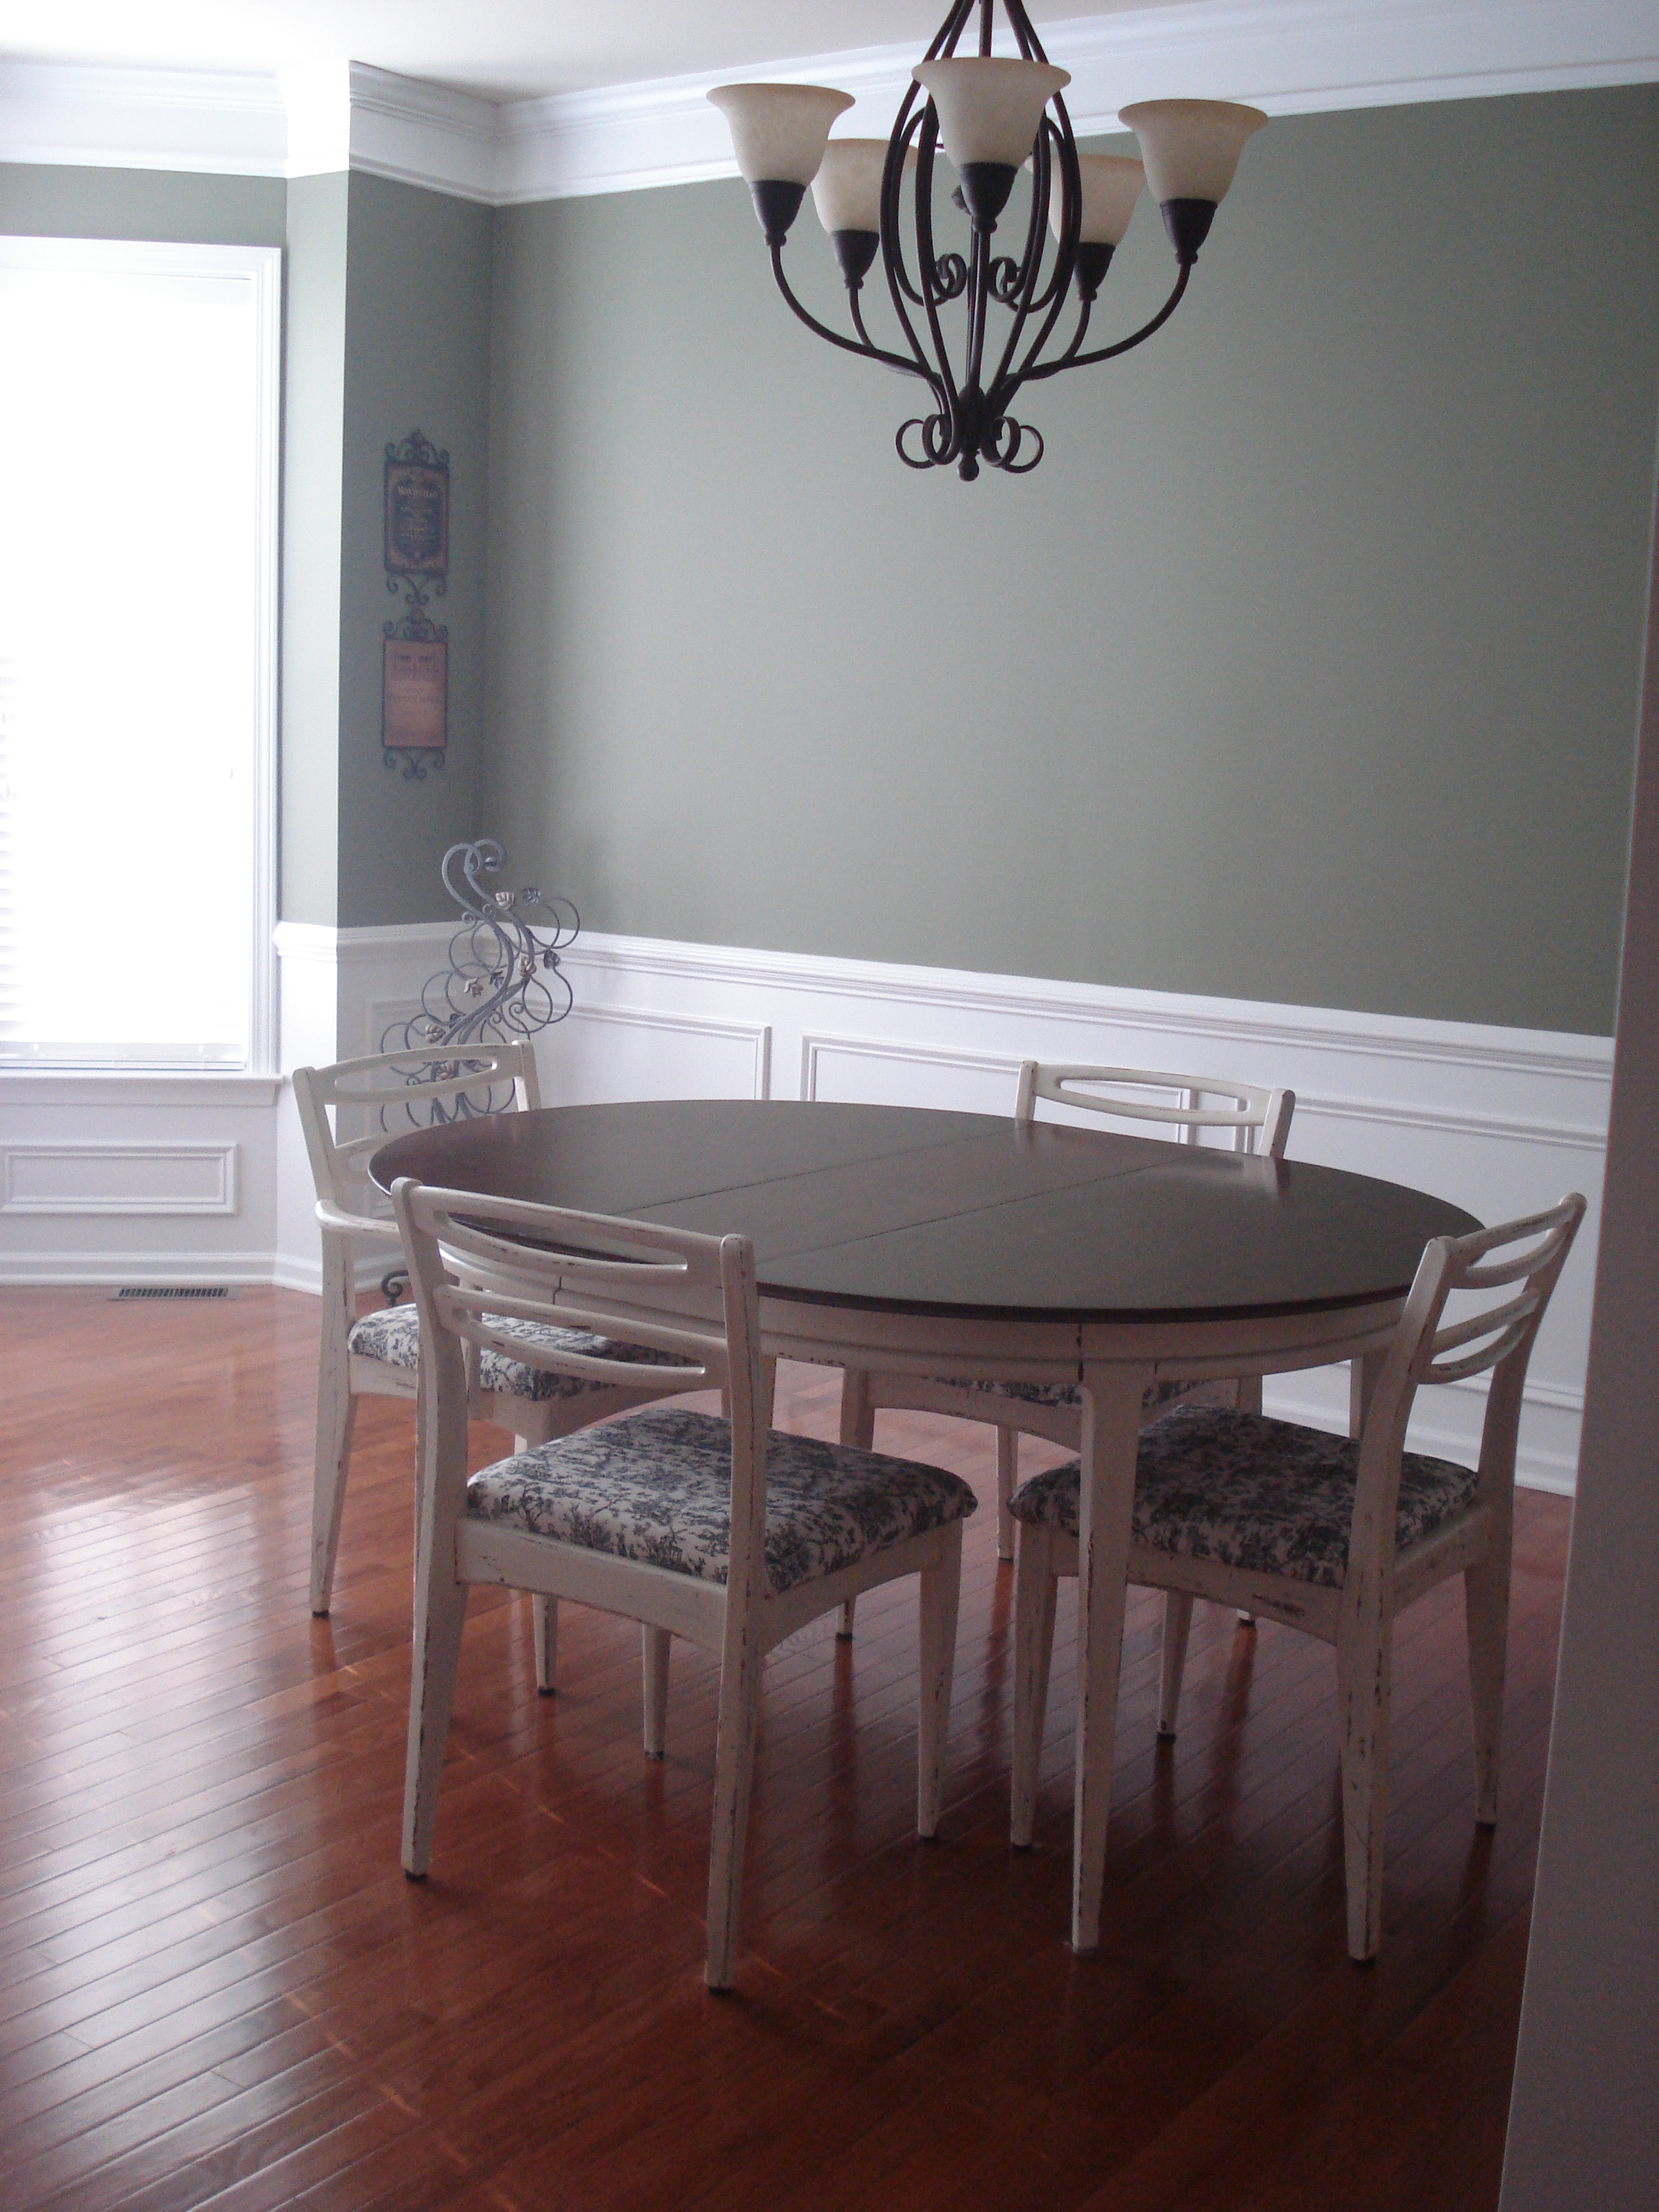
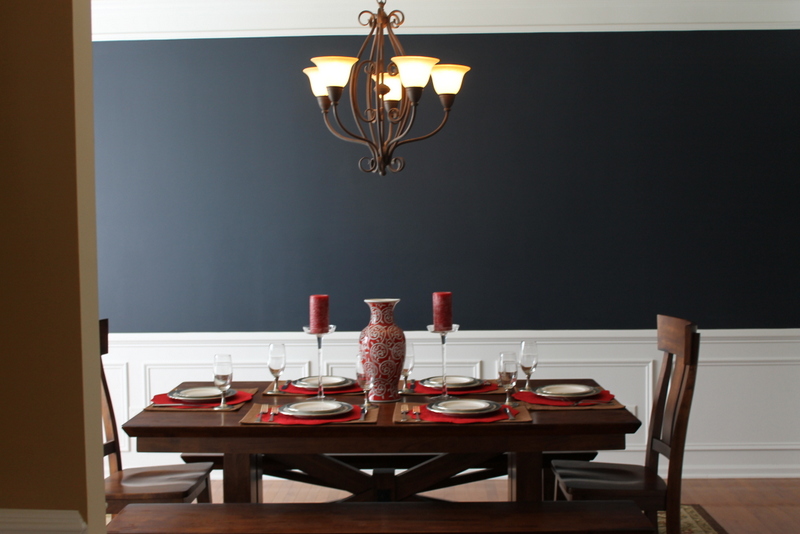
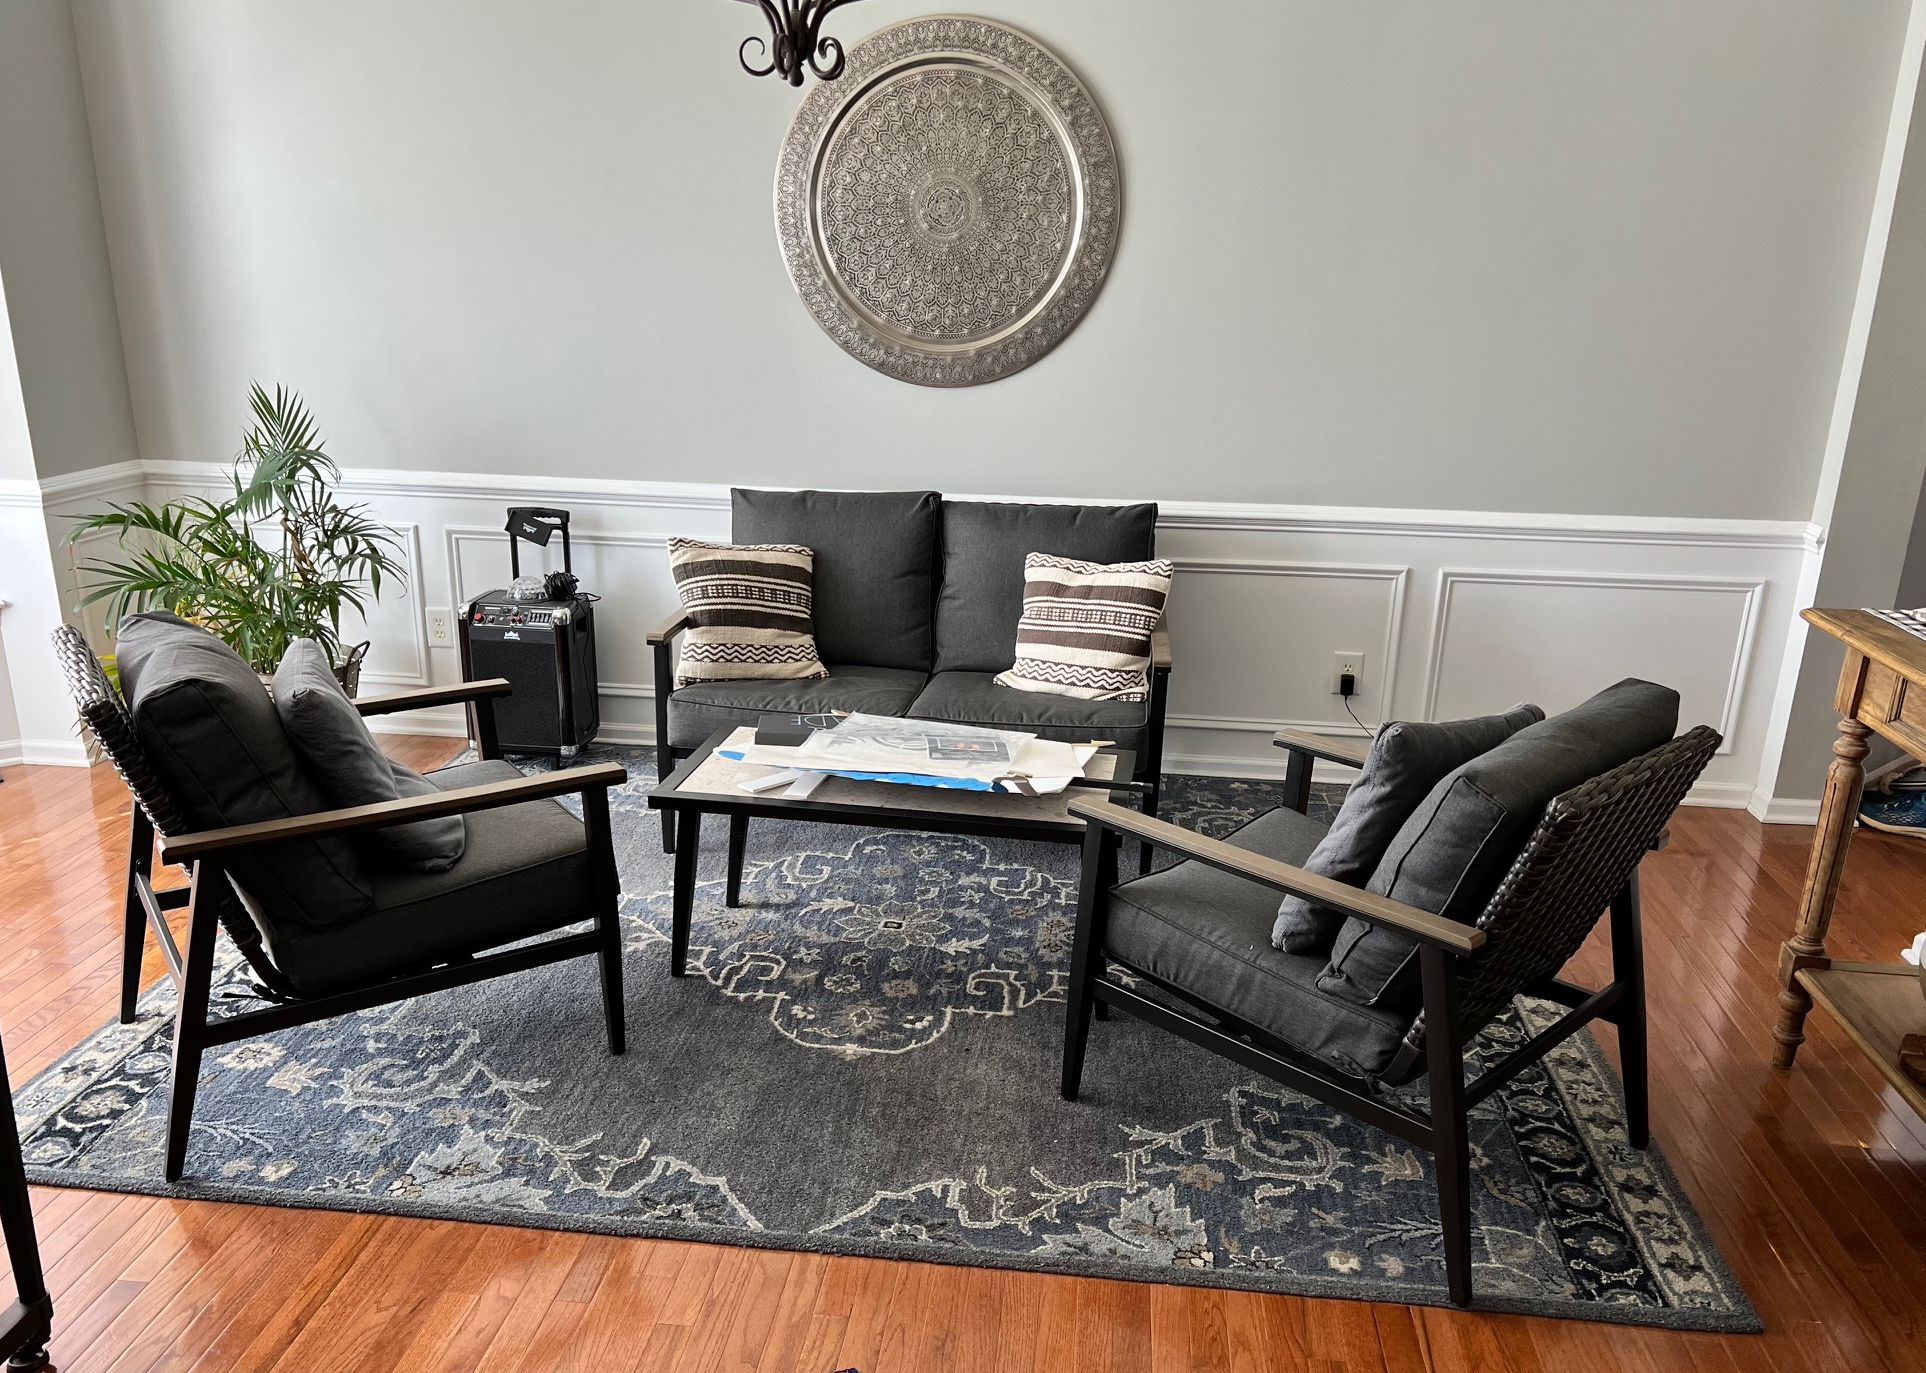
Safe, comfortable…these are words I like! So, when it came time to update a room in our home, I naturally leaned towards the safe design choice. I finally realized that mindset had not been working for this particular room. When our home was built, this space was obviously planned to serve as a dining room. To us, the only purpose it served was to collect dust! We also tried it as a play/puzzle/put- all-the-furniture-that-eventually-leaves-the-house-room. This green, then navy, then gray room (yes we painted it 3 times) needed a refresh and it needed to be BOLD!
So, if you’ve ever thought of being bold with a room design, I say go for it! You’ll be happy you did!
“If baking is any labor at all, it’s a labor of love. A love that gets passed from generation to generation.
Regina Brett
Tried and true, family recipes are special! They bring back memories of time spent together. Whether it’s a major milestone or just to celebrate an every day kind of day, family recipes have a way of elevating the ordinary to the extraordinary! That said, sometimes they can be a little intimidating. You know what I mean, can you ever make something *just* like Grandma made it? Probably not, but I challenge you to try it anyway. You never know, it could turn out even better than Grandma’s. Even if it doesn’t, you’ll get an A for effort!
Have you ever thought of making an old family recipe? Well, this “Prize- Winning” Cream Cheese Pound Cake is a great place to start. After all, it is “Prize- Winning” and aren’t we like family?
Step 1: Preheat your oven to 300 degrees. Prepare a 10 inch bundt pan with shortening and flour. Allow your ingredients to sit at room temperature for 20 minutes.
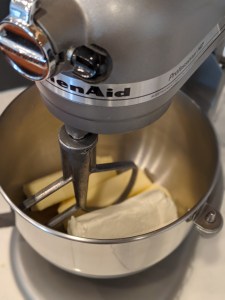
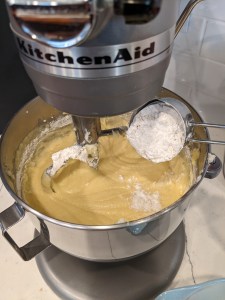
Step 2: Beat butter and cream cheese together at medium speed with an electric mixer until creamy, about 2 minutes.
Step 3: Gradually add in sugar 1 cup at a time, beating until light and fluffy.
Step 4: Add in eggs, one at a time, beating just until the yellow disappears.
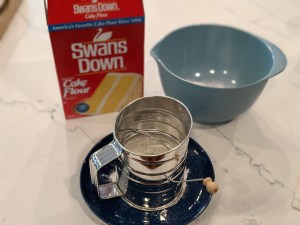
Step 5: Combine sifted cake flour and salt in a separate bowl.
Step 6: Add the flour mixture to butter mixture 1 cup at a time. Mix at low speed just until blended.
Step 7: Add vanilla. Scrape down sides with a spatula and blend briefly on low speed.
Step 8: Spoon batter into prepared pan and bake at 300 degrees for about 1 hour and 8 minutes or until toothpick inserted in center comes out clean. Watch carefully- I take mine out when the toothpick is mostly clean as the cake will continue to cook a little bit once out of the oven.
Step 9: Cool in pan on a wire rack for about 20-25 minutes.
Step 10: Remove from pan and enjoy your “Prize-Winning Pound Cake”!
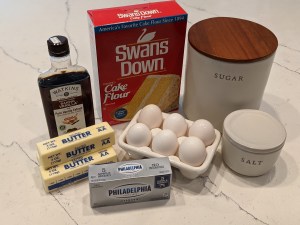
Cream Cheese Pound Cake
3 sticks of butter
1- 8 ounce package of cream cheese
3 cups of sugar
6 eggs
1/8 teaspoon of salt
3 cups of cake flour, sifted
2 teaspoons of pure vanilla extract
Directions:
Preheat oven to 300 degrees. Prepare a 10 inch bundt pan with shortening and flour. Allow your ingredients to sit at room temperature for 20 minutes.
Beat butter and cream cheese together at medium speed with an electric mixer until creamy, about 2 minutes. Gradually add in sugar 1 cup at a time, beating until light and fluffy. Add in eggs, one at a time, beating just until the yellow disappears.
Combine sifted cake flour and salt in a separate bowl. Add the flour mixture to butter mixture 1 cup at a time. Mix at low speed just until blended. Add vanilla. Scrape down sides with a spatula and blend briefly on low speed.
Spoon batter into prepared pan and bake at 300 degrees for about 1 hour and 8 minutes or until toothpick inserted in center comes out clean. Watch carefully- I take mine out when the toothpick is mostly clean as the cake will continue to cook a little bit once out of the oven. Cool in pan on a wire rack for about 20-25 minutes. Remove from pan and enjoy your “Prize- Winning Pound Cake”!
With most family recipes, there is usually a sweet story or memory that makes it more than just ingredients on a piece of paper. For this one, I’ll take a minute and share it’s story. One day, I was feeling a little down and defeated. The hubby had recently lost his job. It was nearing my birthday and I didn’t feel much like celebrating. At the time our church held an annual picnic and there was to be a baking contest for the best pound cake. After much persuasion from certain family members, I decided to enter the contest. However, I had no recipe. My mother-in-law presented me with her mother’s cream cheese pound cake and a few helpful tips. The day of the picnic arrived and I didn’t hold my breath. I guess I wasn’t paying close attention because when they announced that I had won, I didn’t even hear my name! Finally realizing that I had won, I was presented with the most beautiful gift basket which felt like one of the best birthday presents I had ever received. Of course, I got some pretty serious bragging rights too! I hope you’ll enjoy making this recipe and creating fun memories with your loved ones!
Open shelves…In your kitchen? Where will you hide all of your stuff? It will get so dusty? You’ll get tired of it after awhile….
Well, I can tell you with confidence that a year later and I still absolutely LOVE having open shelves in my kitchen. There is just something about looking at beautiful things instead of having a big wall of cabinets in my face.
I won’t get into all the pros and cons here. A quick google search of open shelving will provide you with plenty of those. If you are like me and love being in your kitchen (or just looking at it and admiring how beautiful it is) then hang out with me for a few minutes and see how to do it yourself!
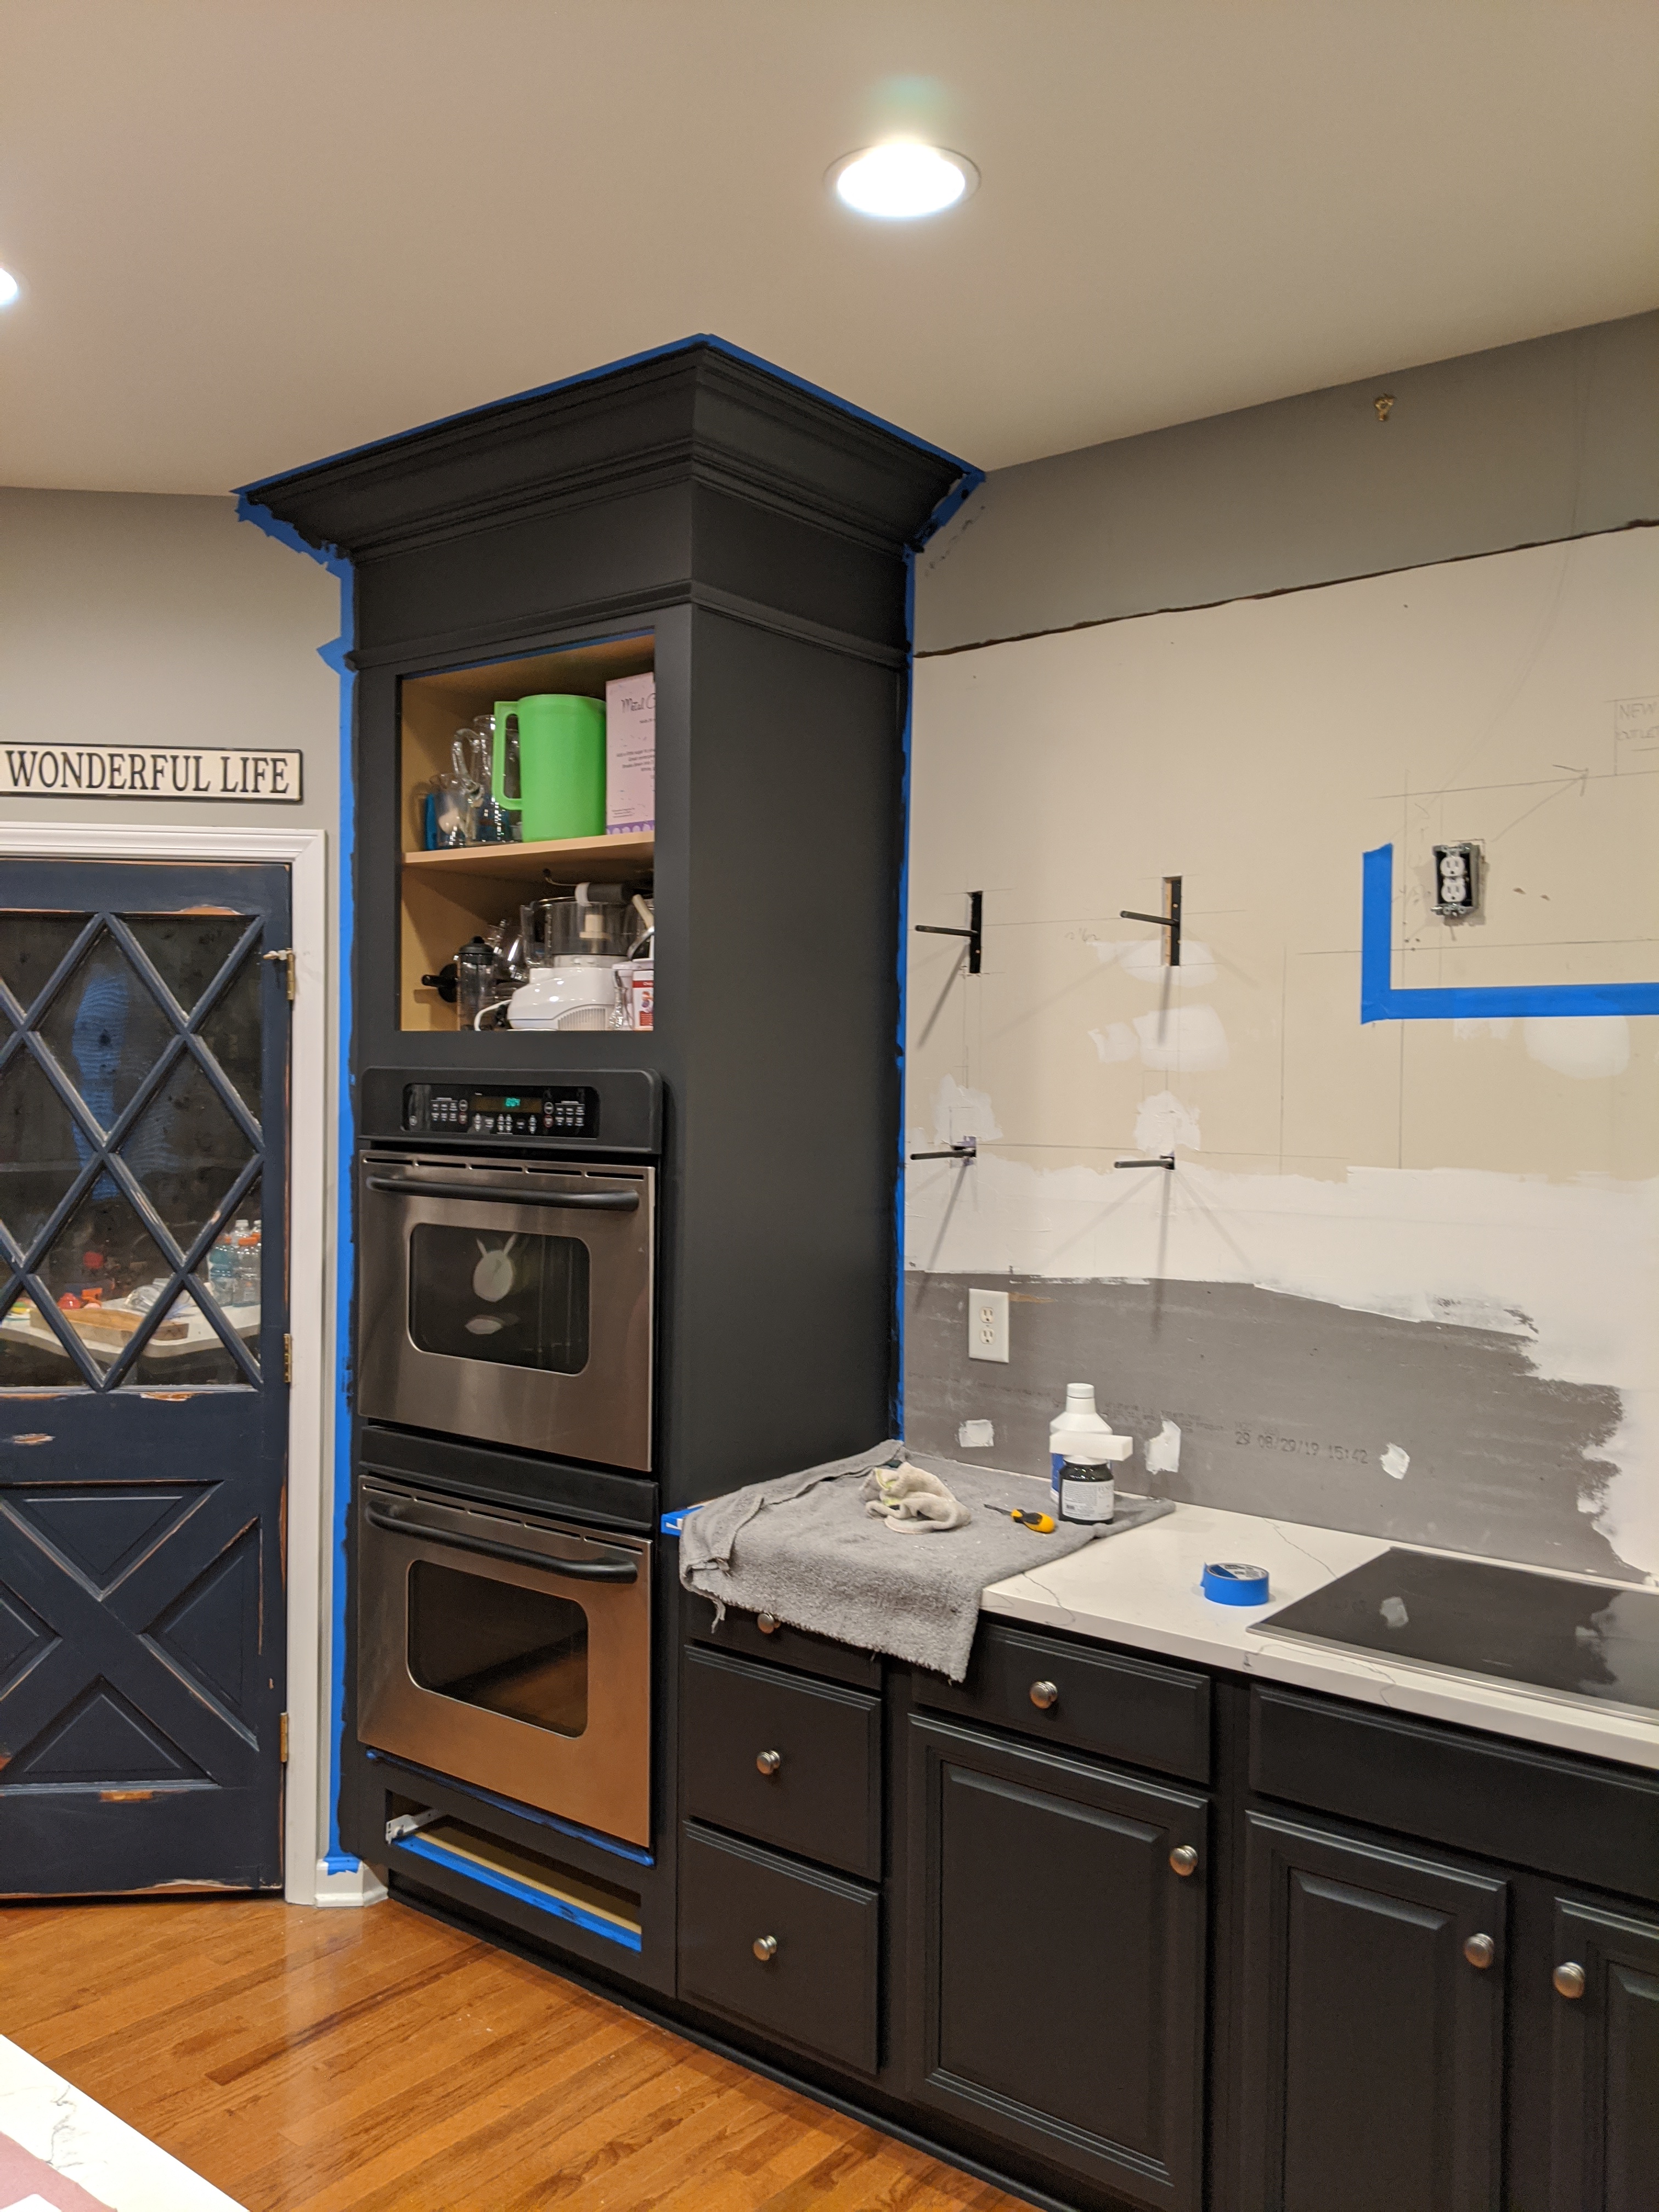
Step 1: Take a deep breath and then proceed to removing those uppers!
Step 2: measure your space and decide the layout. We decided to go with 4 groups of 2 shelves.
Step 3: Choose the material you would like to use for the shelving. We chose butcher block because of its durability and, you know, it is simply gorgeous in a kitchen!
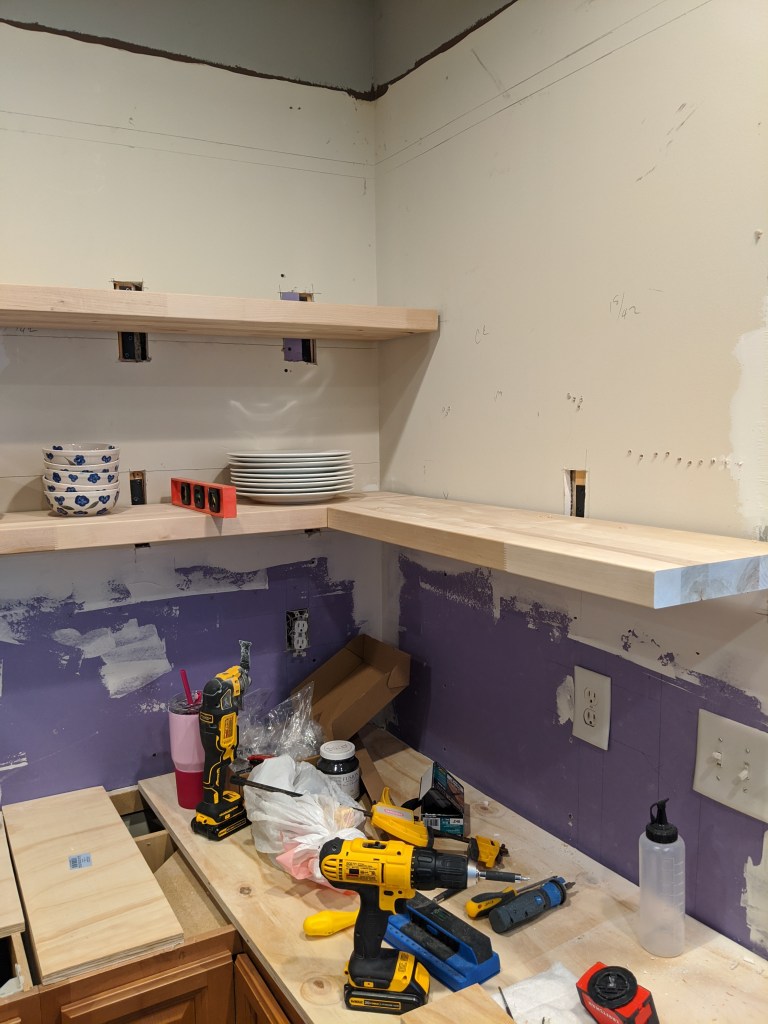
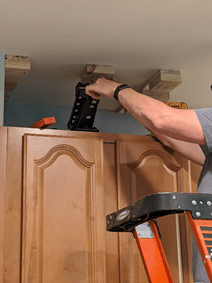
Step 3: Install supporting brackets for floating shelves (*Amazon link below*) We decided our existing backsplash had to go so the hubs was able to countersink the supporting brackets into studs, then place drywall over, and finally add the tile counter-to-ceiling backsplash.
Step 4: Measure the brackets and make holes to match in the back of the butcher block.
Step 5: Test to make sure the holes line up. The hubs is laughing and I’m trying to figure out why… he says, “It might take a couple of adjustments” Whatever is he talking about, I thought they just slid right on the first try. His fault for making it look so easy!
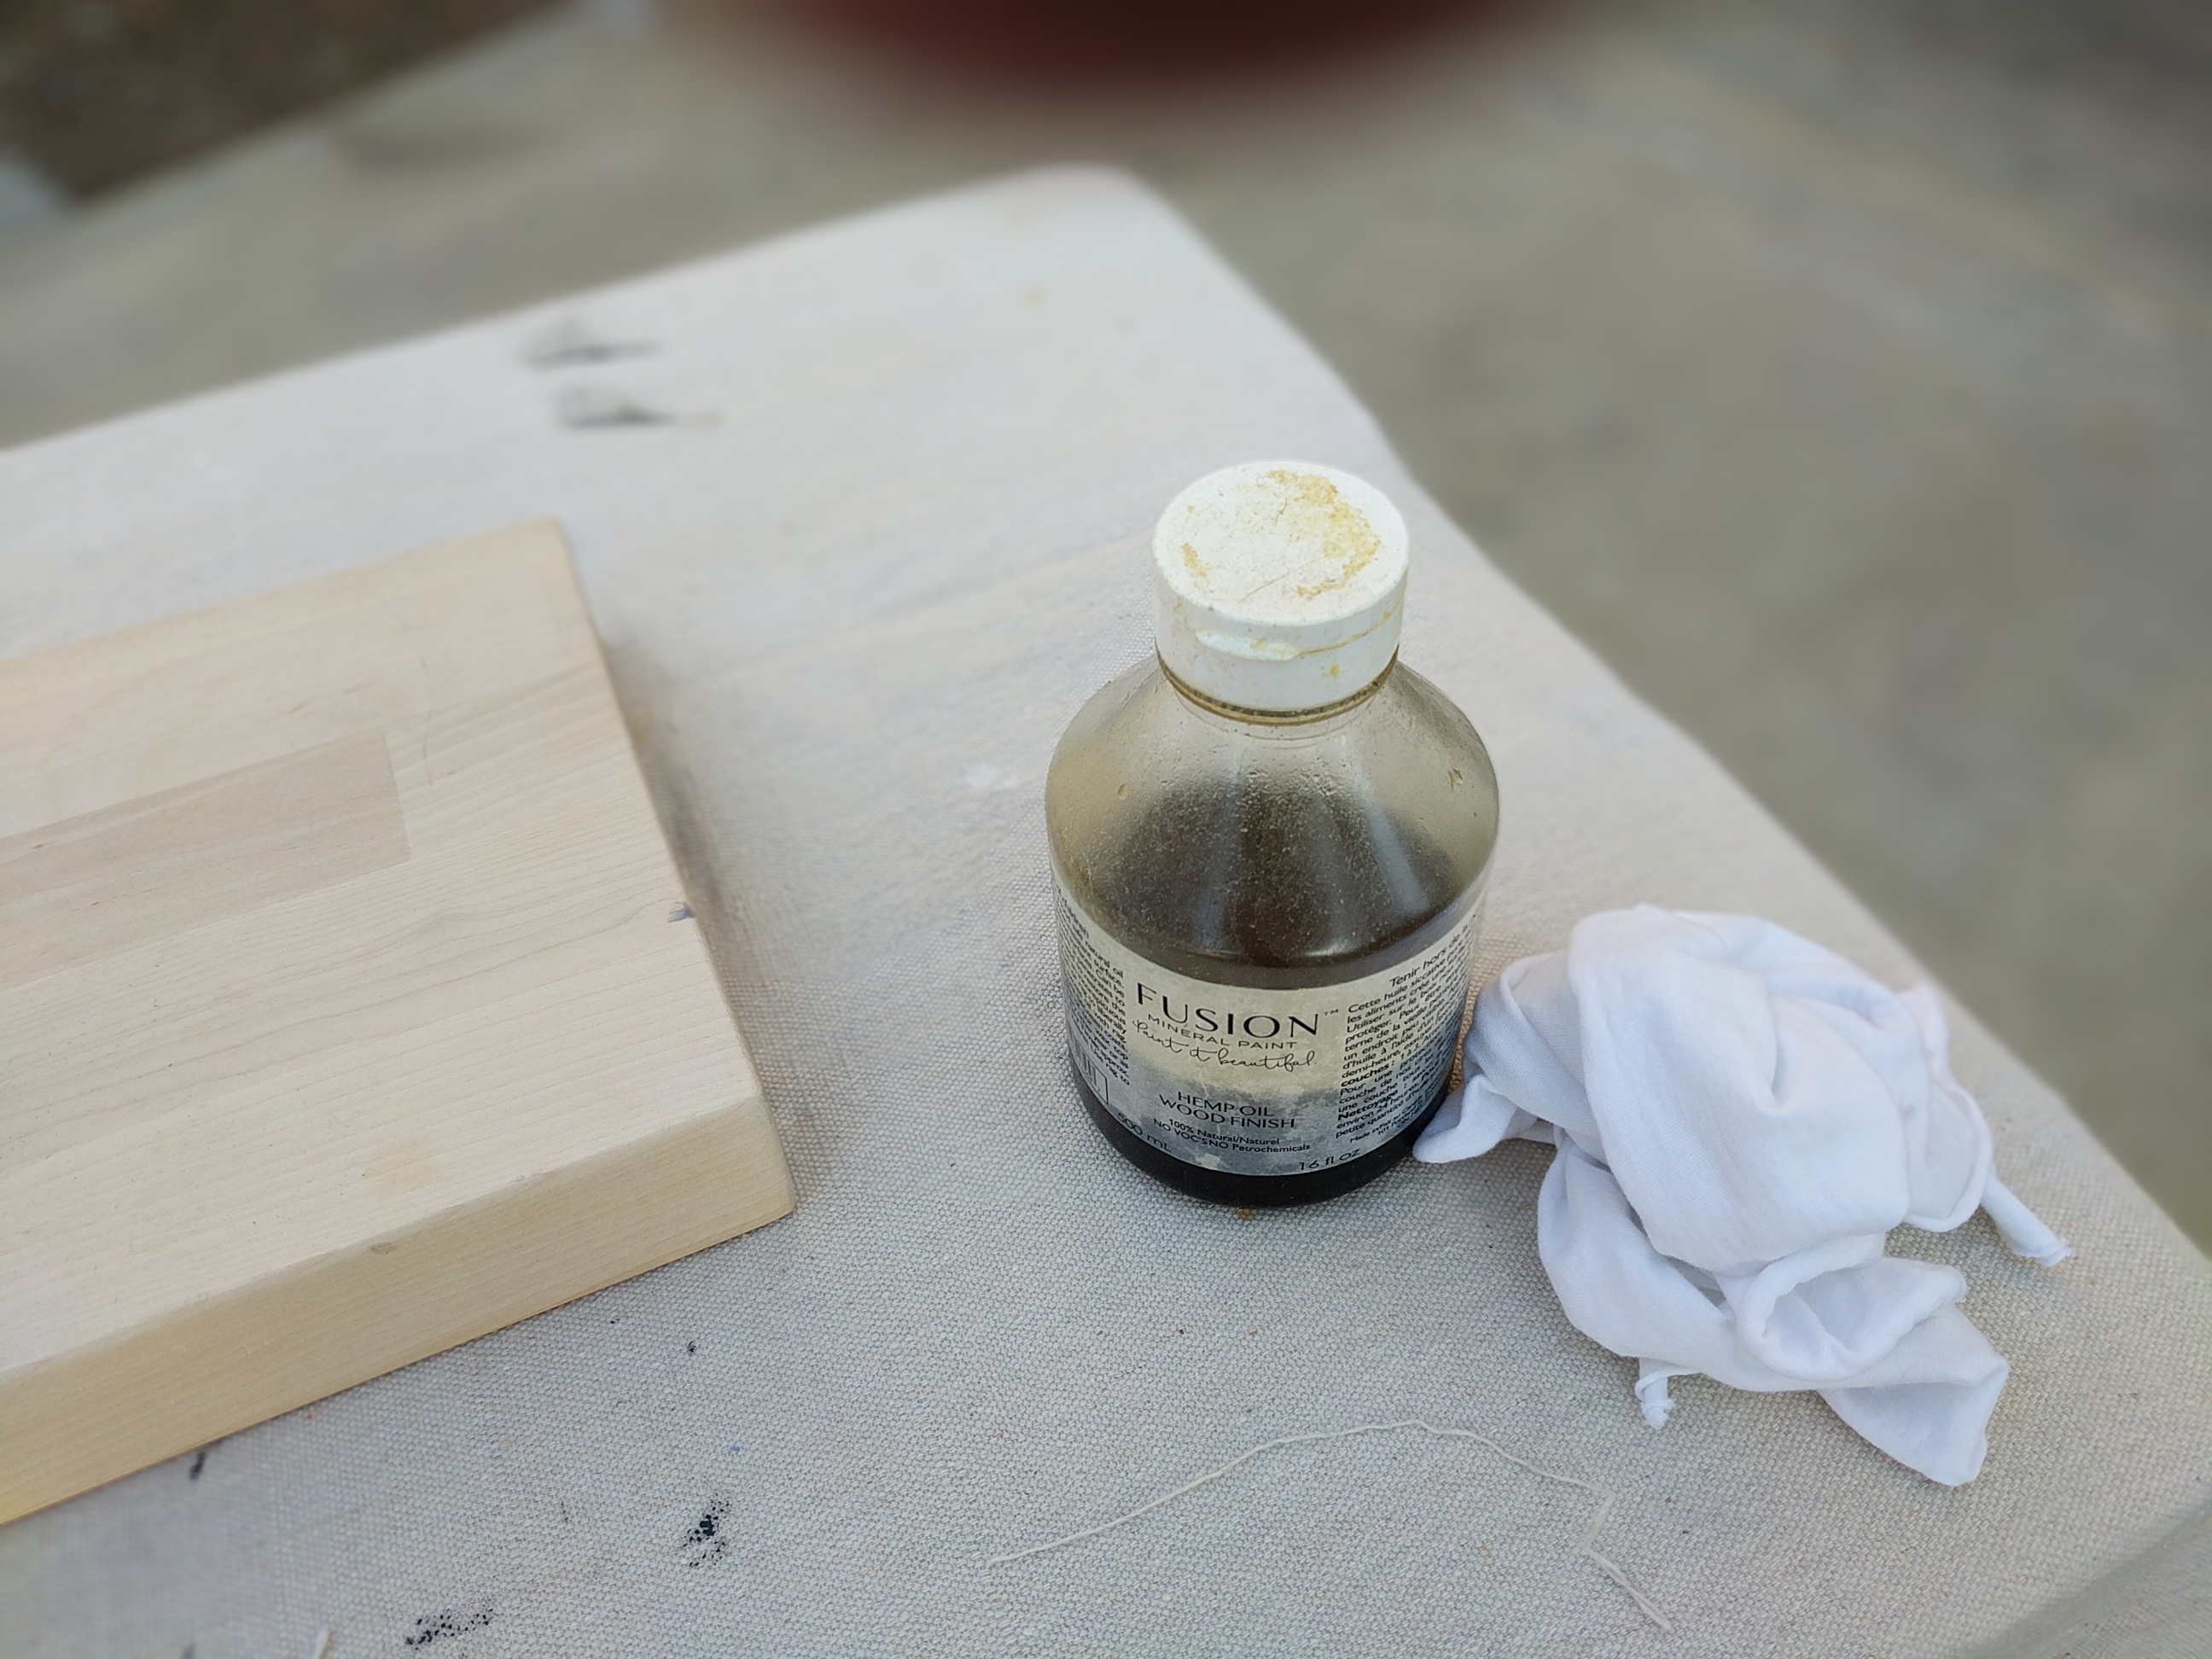
Step 6: Decide the finish for the butcher block. Now, this part is EASY! You choose Fusion’s hemp oil. It is amazing stuff….food safe, easy to apply, wonderful, wonderful stuff. Have you bought yours yet? Seriously, you’ll love Fusion’s hemp oil so much you will look around the house trying to find other things you can put it on. Yep, it’s that great!
*note we tried various other products from stain to tongue oil but it didn’t look good- like at all.
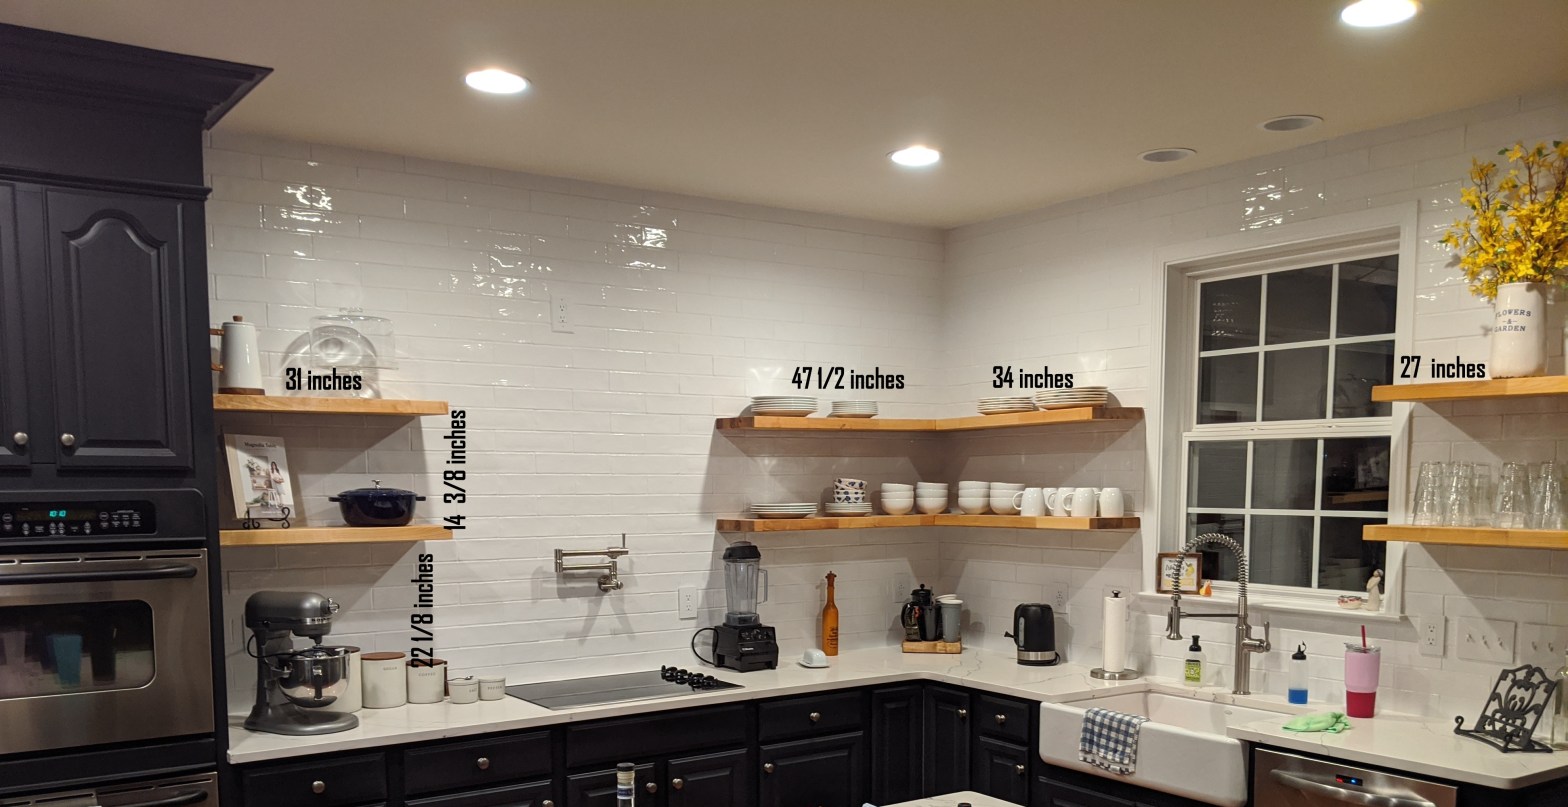
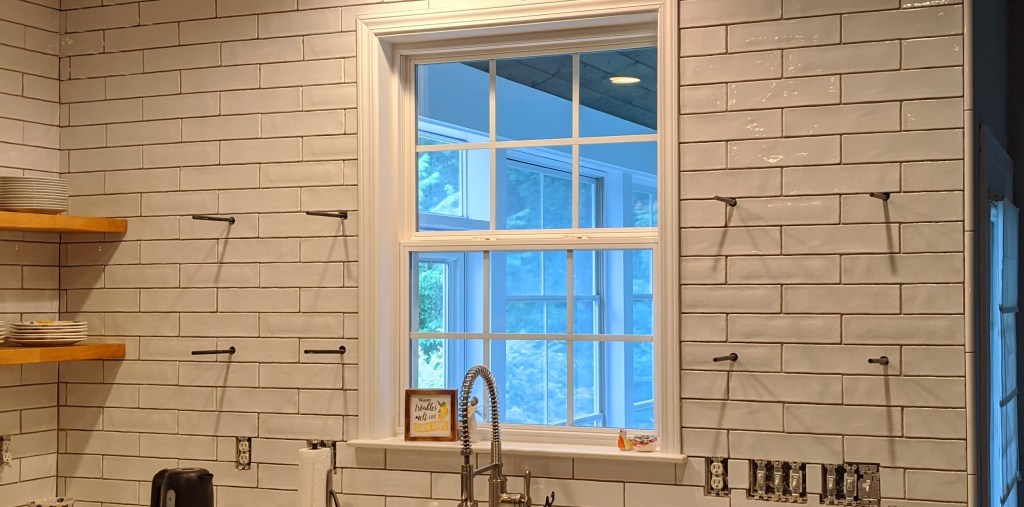
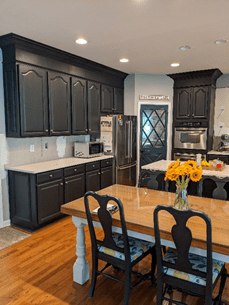
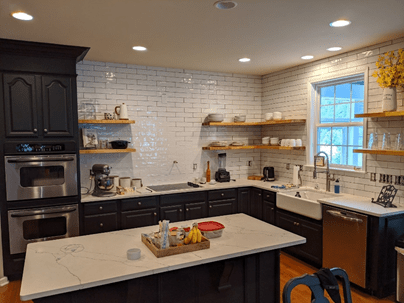
Step 7: Now, the fun part! You get to style your shelves and enjoy the character and beauty of the items you love! Get rid of whatever you were hiding in your cabinets that you never used in the first place. Buy some dishes you love and add some color to your kitchen. Find a sweet message that will inspire you and place that on your beautiful new shelf. Display your favorite cookbook so it is always at your fingertips for when you want to whip up something delicious! You could place a pretty plant….the possibilities are endless! Enjoy!
“There’s only one thing more precious than our time and that’s who we spend it on.”
-Leo Christopher
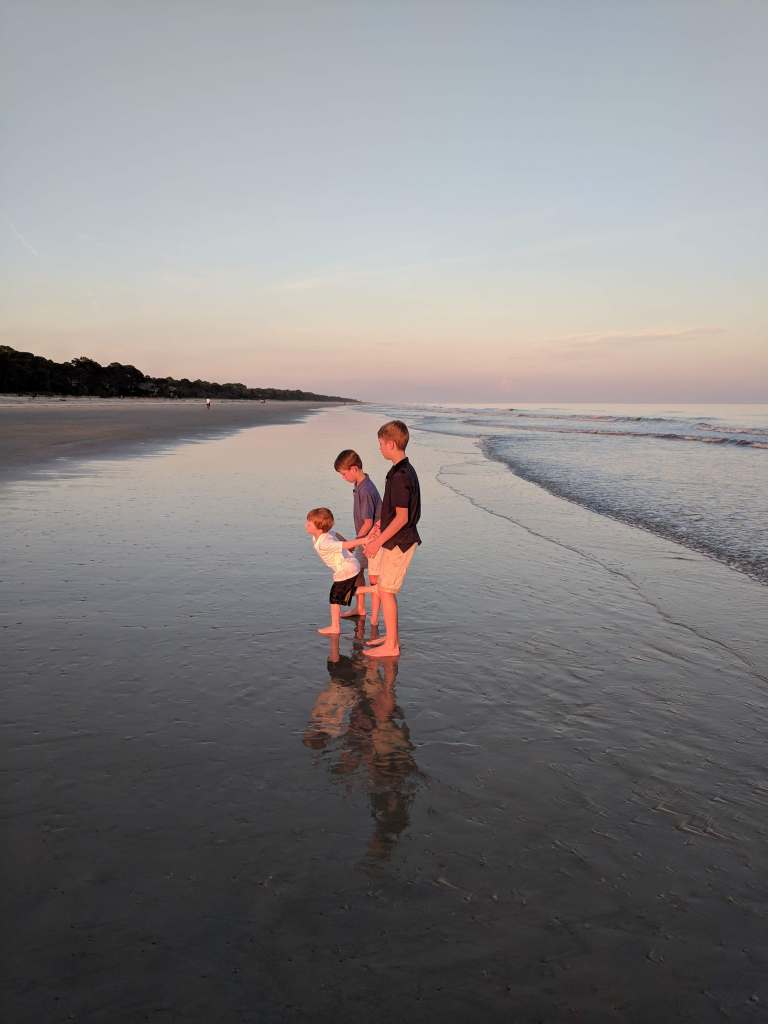
Can you remember your favorite gift you received for Christmas last year? Can you remember any gift you received for Christmas last year? Let me ask you another question, Can you remember who you spent Christmas with last year? Aha! I bet you can! The reason being; we remember experiences far better than we remember the things we receive. Now, things can be good! Our phones are things and they allow us the ability to connect with loved ones, which is especially important as we have learned this past year. Our vehicles are things and they help us get to work, serve a neighbor, or get to a doctor. There are many things we have and need that are helpful. With three boys, though, sometimes the things can really start to add up, especially at Christmas time. So this year, I wanted to rethink what I was giving them…more things or more of my time?
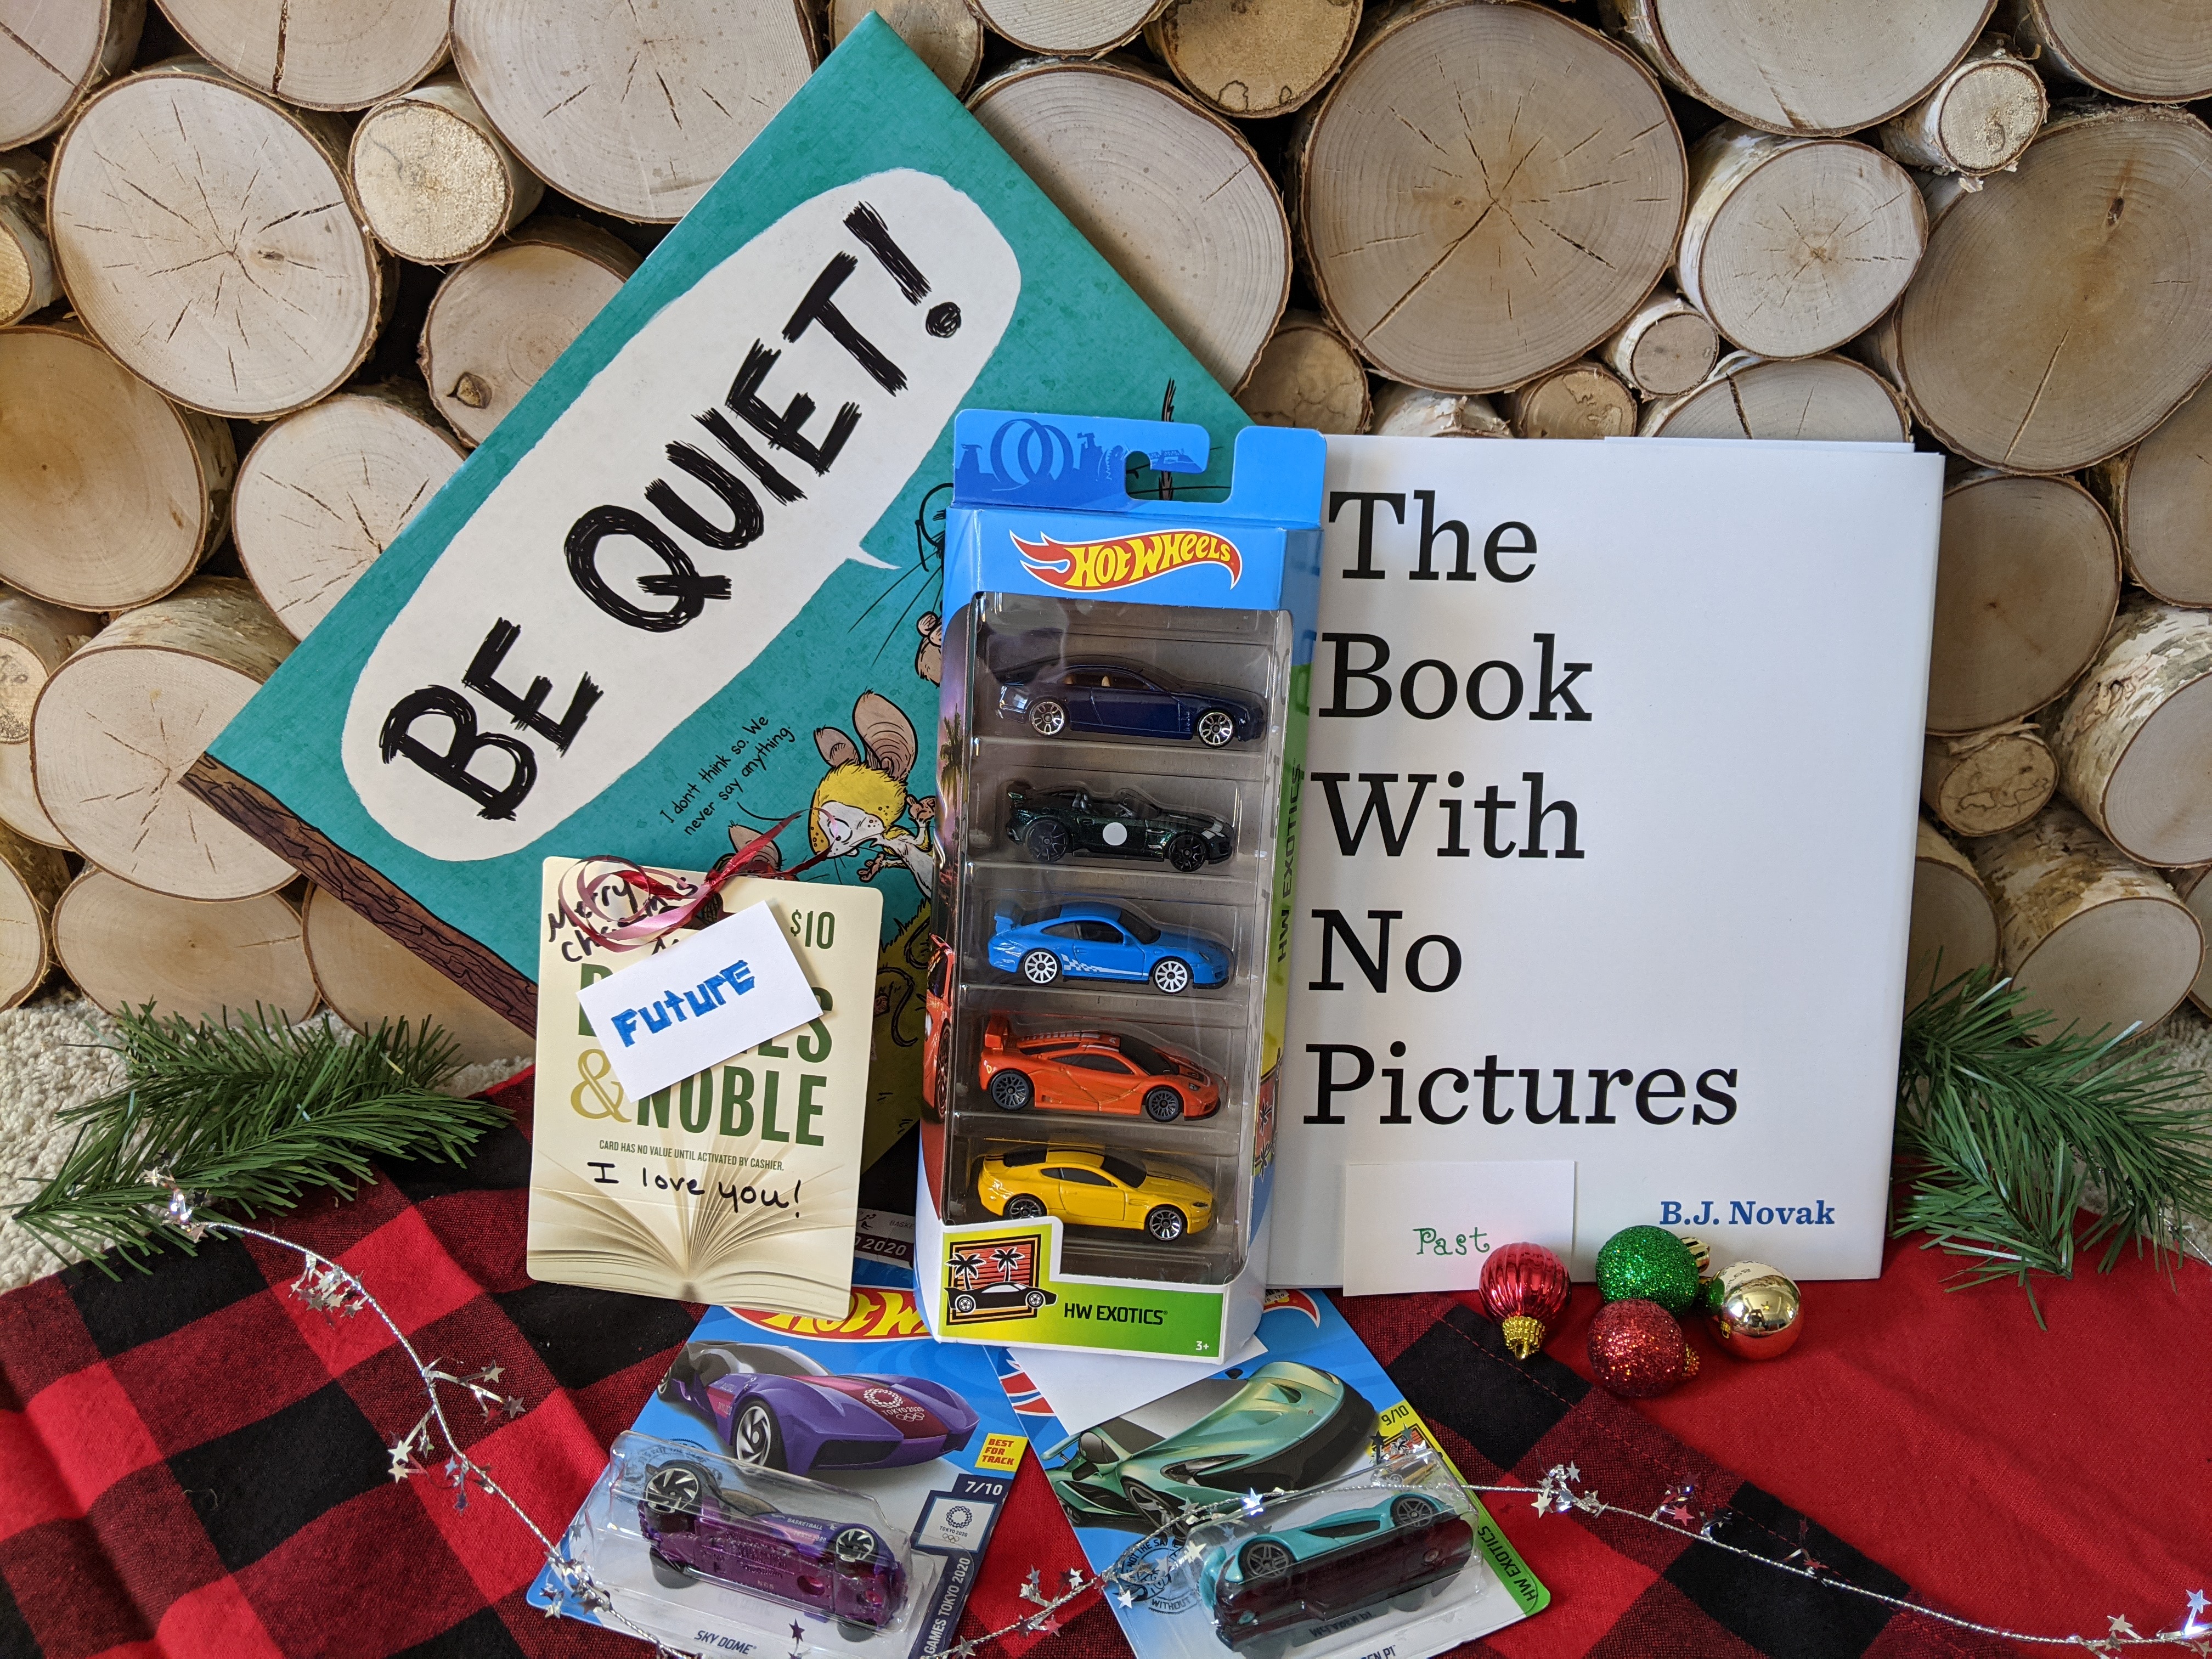
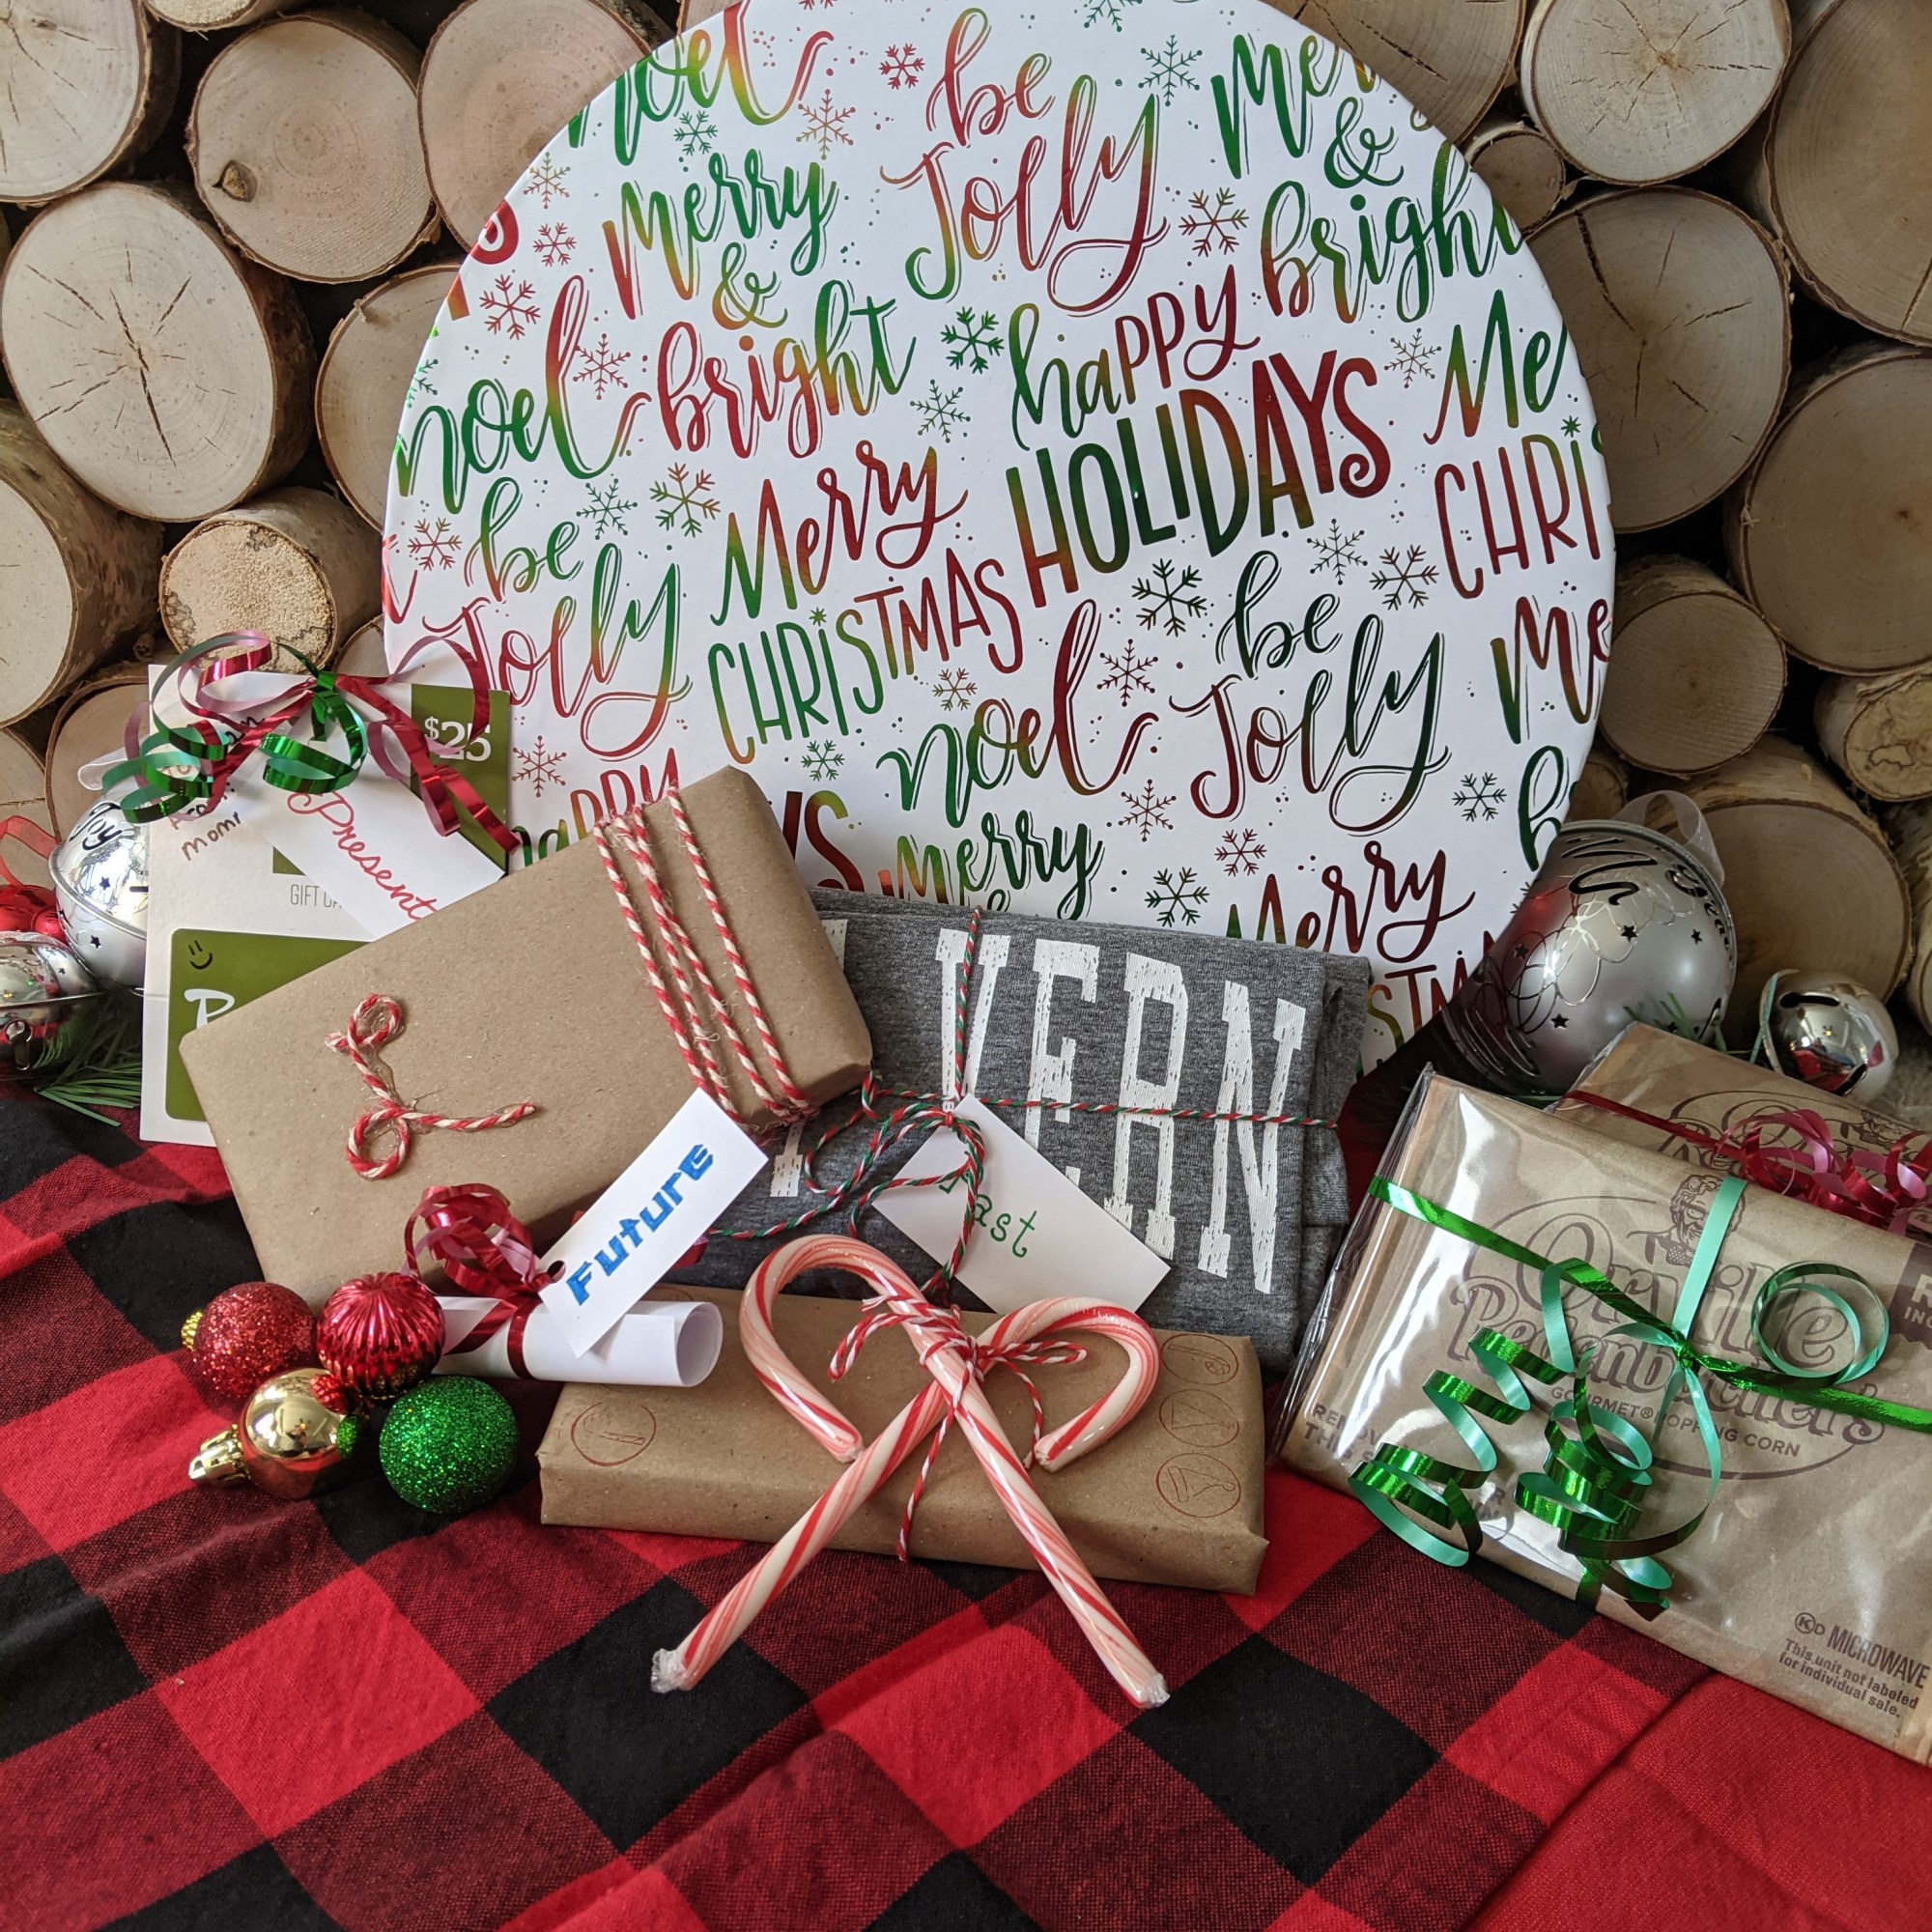
I always try to gift my boys, ages 13, 10, & 5, with something special and unique that isn’t from a wish list, although they do get a couple of those from Santa. Sometimes the gift fulfills a need. For example, one year I gave them warming pads for their beds, which they really really loved and enjoy even to this day. A couple of years ago, I hand made a stuffed animal for each of them. They were not perfect but I can guarantee they were one of a kind. Another Christmas, I gifted them with their own copy of a favorite book that they had checked out from the library that year. So, this year was no different and as I reflected back over this crazy year that was 2020, I realized that even though we had spent a lot of time together, it was still flying by way too fast. So I got an idea in my head and well, we know how that goes! This Christmas, I am giving them time boxes! First, what is a time box you may ask? It is simply a box containing a gift from the past, a gift for the present and one to look forward to in the future. I couldn’t be more excited to see their faces when they open their packages on Christmas morning!
My youngest has always loved to cuddle up and read so his “past” gift is two new books for us to read together. He asks me every day to play with him so I bought a hot wheels car for him and one for me (and a few extra) so we can play together- his “present” gift! Last, for his “future” gift I am giving him a Barnes and Noble gift card so we can go on a “mommy date” as he calls it!
My middle son is my snuggler, he always has been so his “past” gift is a shirt! A shirt? Yes, the only way I could get him to sleep as a baby was to give him my shirt. That shirt is now quite tattered and falling to pieces, so I searched and found him a new one! His “present” gift is a Panera gift card because we love going to get cookies together. For a “future” gift we will snuggle up and watch a Harry Potter movie while enjoying some candy and popcorn!
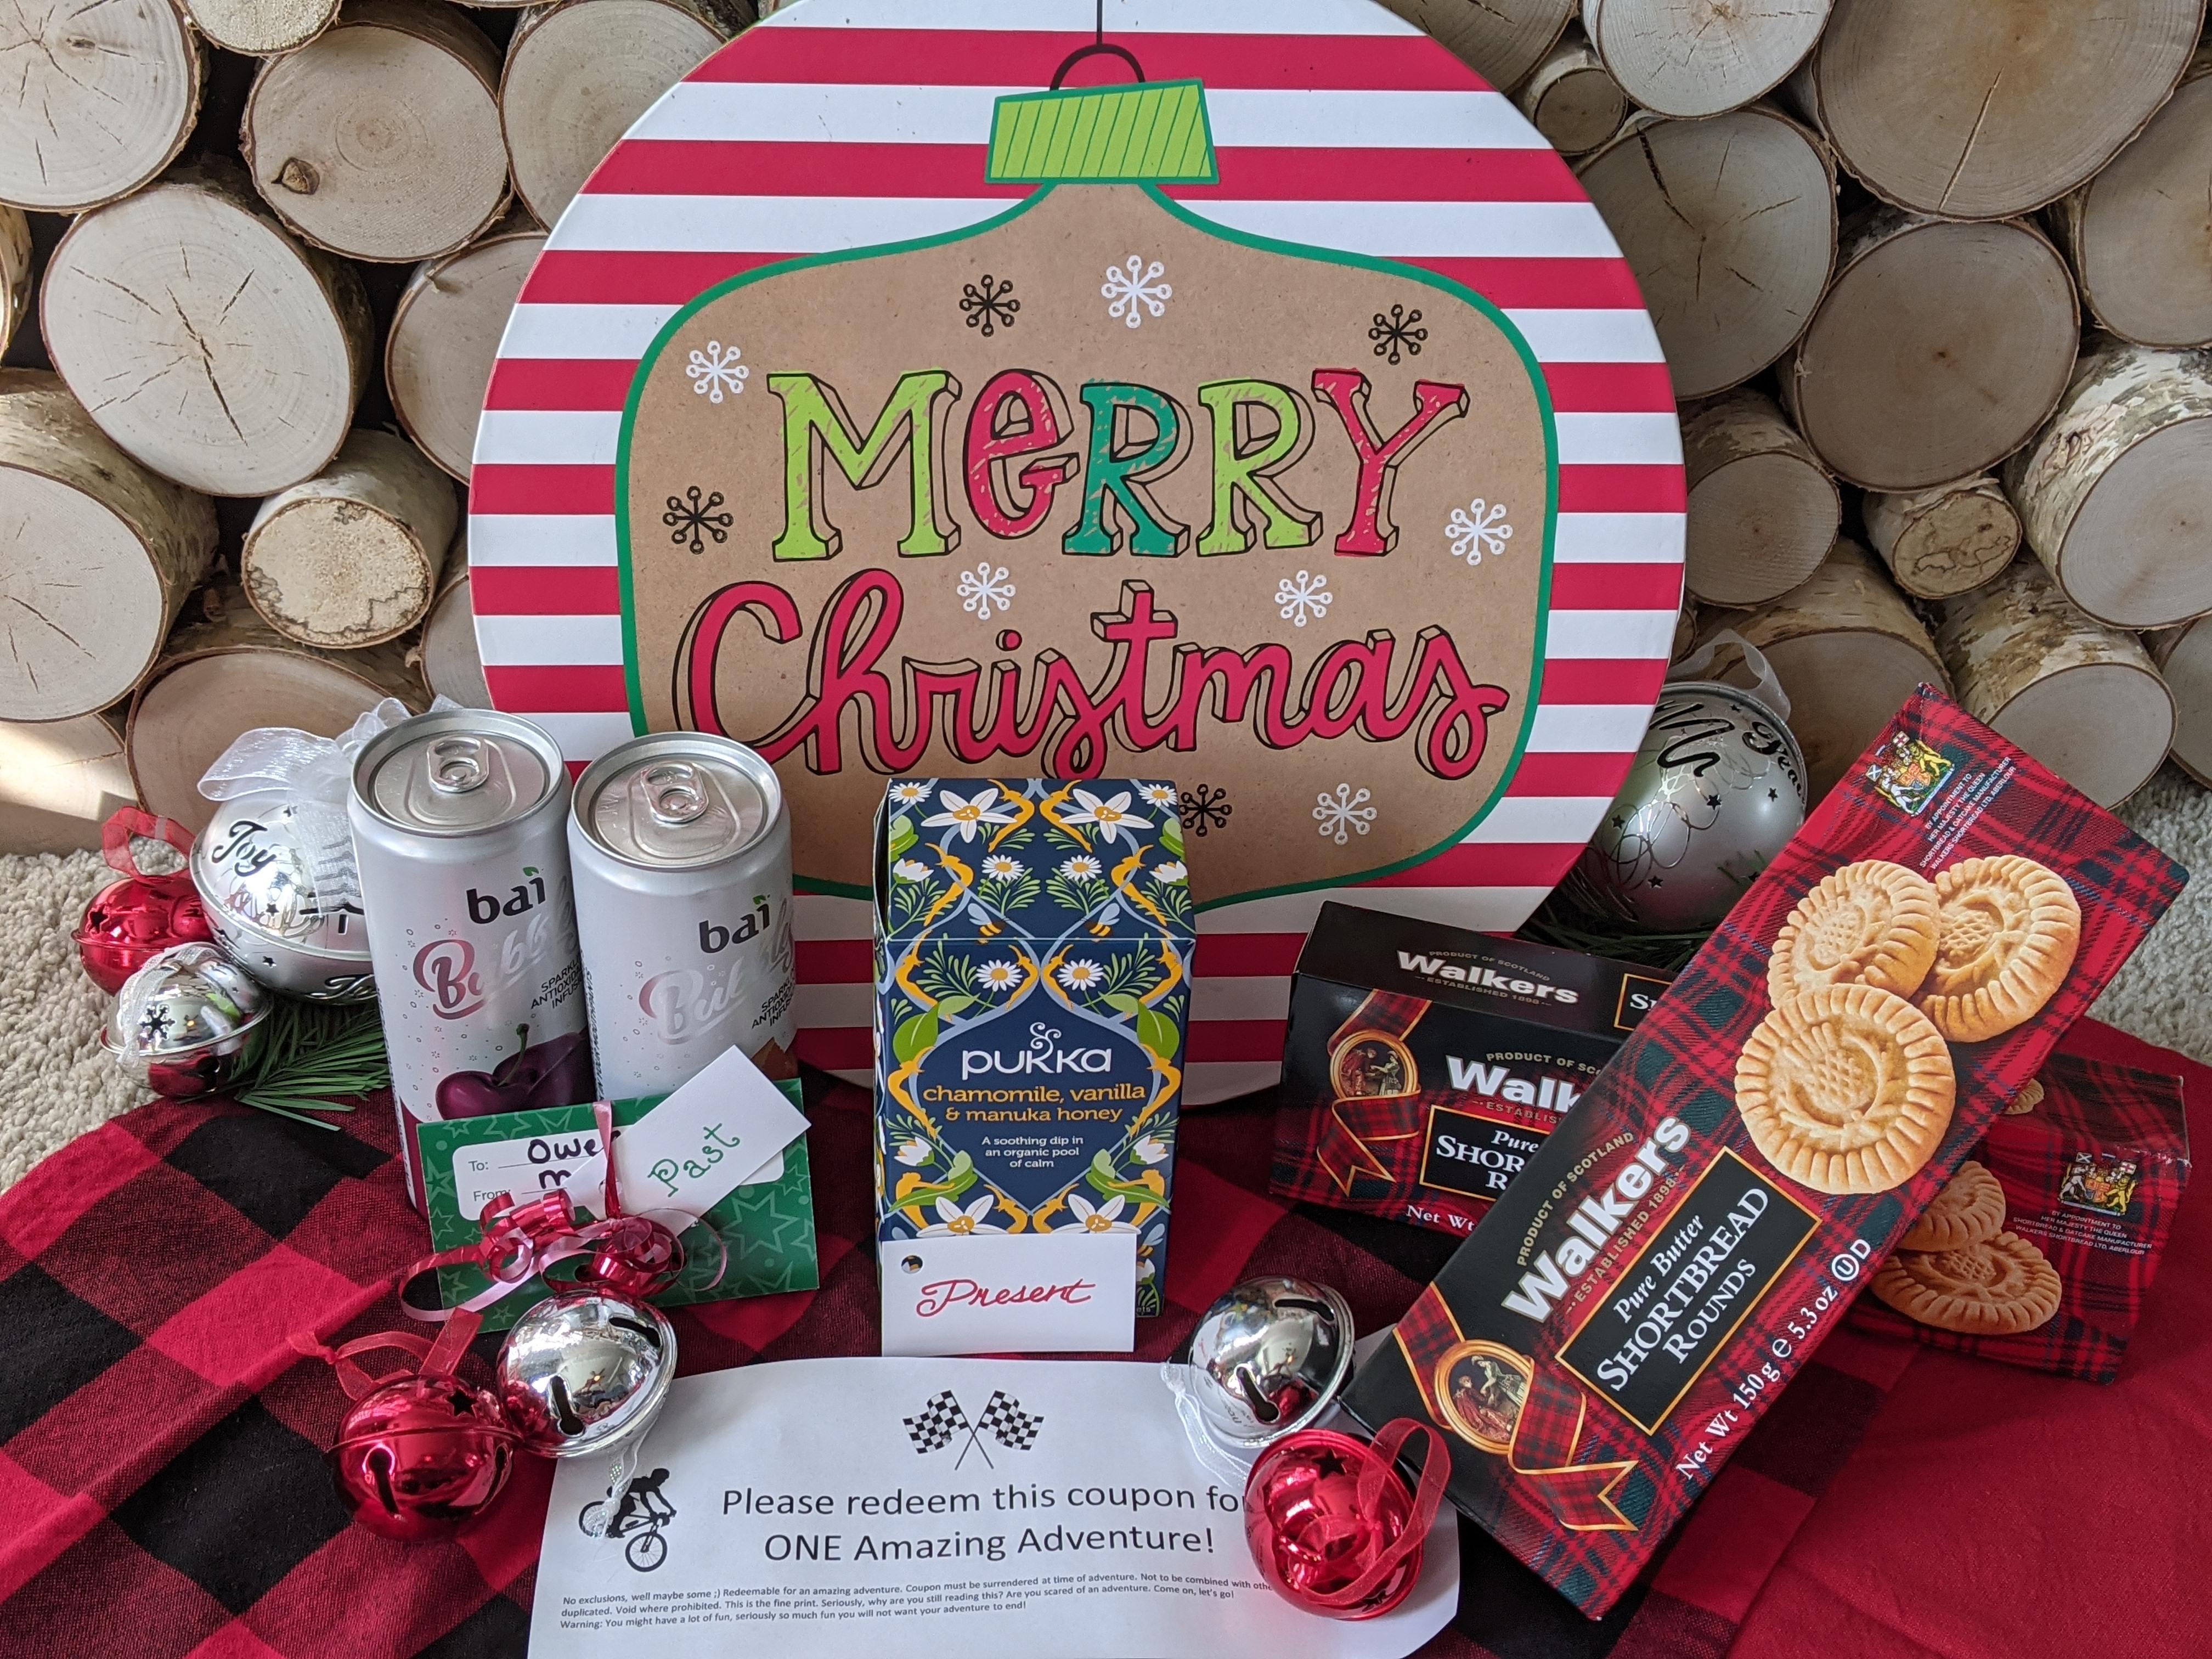
My oldest, he’s 13, so yeah I’m savoring every moment. He became a teenager this year in so many ways and I love that he still thinks it’s cool to hang out with his mom. His gift to represent the past is a Harris Teeter gift card. Before this crazy year, our Saturday routine was he and I going to the grocery store together. He mentioned the other day how much he misses it! I think he will really enjoy being able to buy gum, drinks and fresh veggies…haha probaly not but a mom can hope! His “present gift is tea and cookies. We have a Tuesday tradition of enjoying tea and shortbread cookies while we work on his writing assignments. Finally, his future gift is a coupon for an adventure- mountain biking, air soft, or racing at K-1 Speed. The “fine print” really cracks me up!
I can hardly wait for Christmas morning! I love that the gifts are something tangible but the real gift is a gift of time that we will enjoy long after the pretty packages are opened!
Have you ever thought of gifting someone with the BEST gift, the gift of your time? Merry Christmas friends!
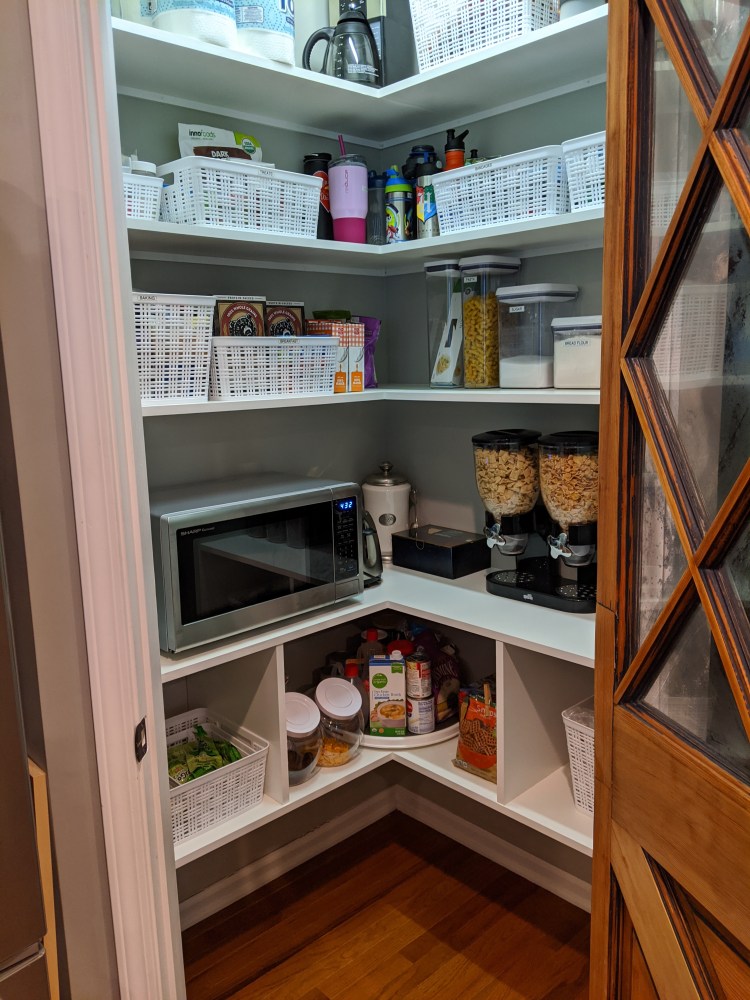
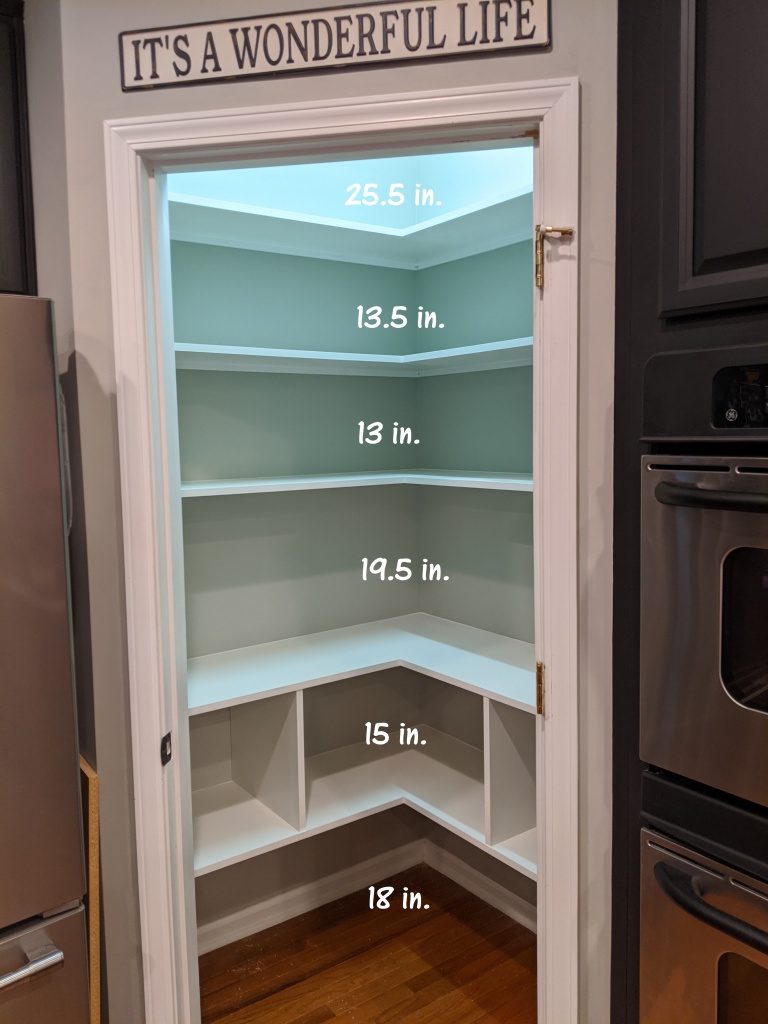
I have 3 growing boys in my house so when I say I need a pantry, I mean I NEED a pantry in my kitchen. We joke that it should have a revolving door-someone always seems to be “hungry”. In the 11 years we’ve been in our home, the pantry has undergone 2 makeovers. The latest, during our big kitchen renovation.
Have you ever thought of ditching those wire shelves and having the perfect pantry? If so, read on for some DIY friendly information and photos- I couldn’t be happier with how ours turned out, it is quite possibly my most favorite thing we did during our kitchen renovation.
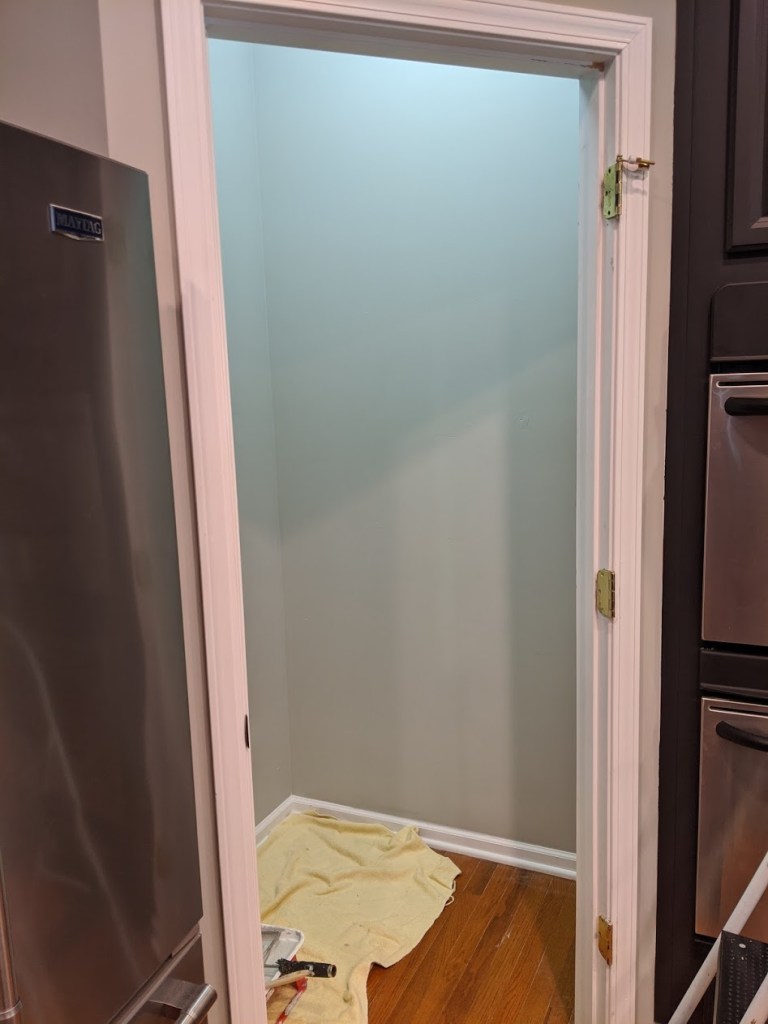
The after photo from our first pantry makeover
After removing the previous shelving and brackets, we had A LOT of holes to patch! It looked like a woodpecker had gotten trapped inside there were so many holes- yikes! I don’t have a picture of that hot mess.
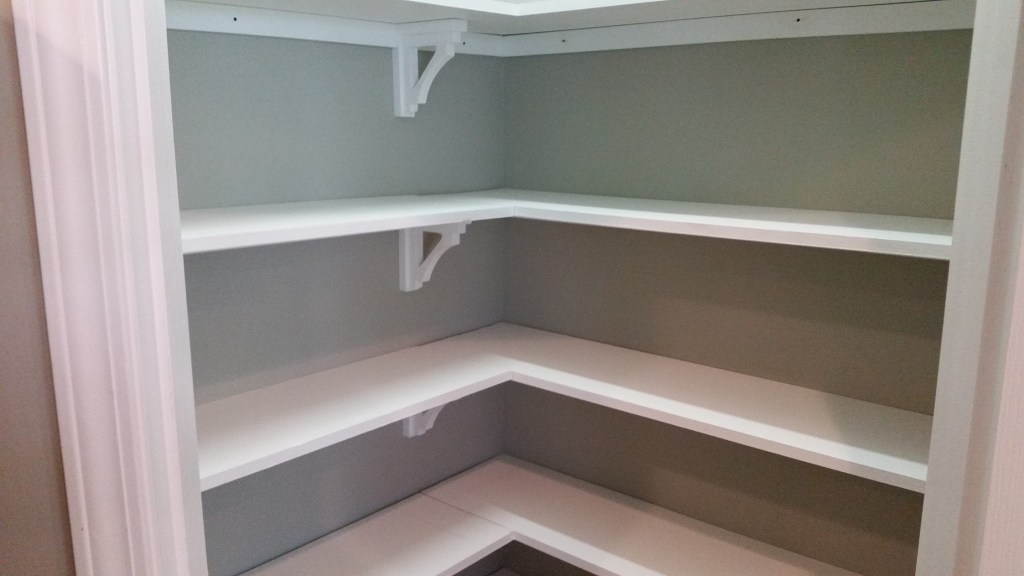
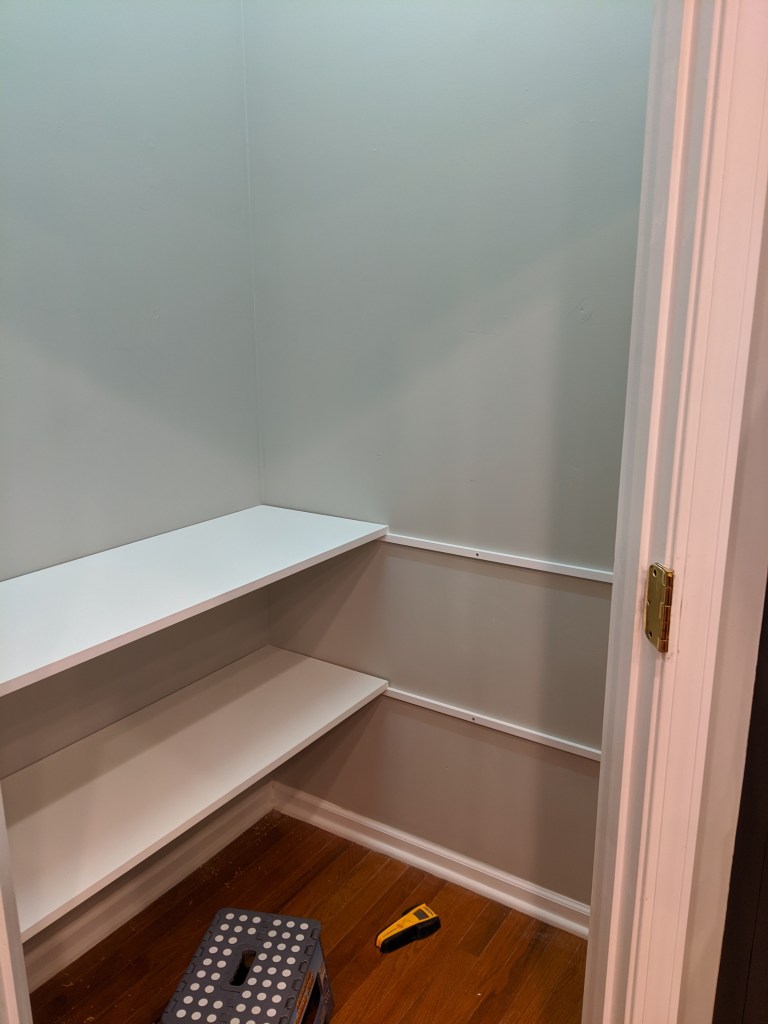
All of the holes patched and a fresh coat of paint
Now that we had a blank slate, the hubs had to read my mind- he literally did! I must have looked at a million pictures on Pinterest and still I was having a hard time articulating the look I was going for. I knew I didn’t want anything touching the floor, I wanted it to be built in (ie: super custom) and I wanted it to have a “counter space” for the microwave. Oh, and I didn’t want to paint. Easy, right?
Work in progress- I’m glad I am so patient!
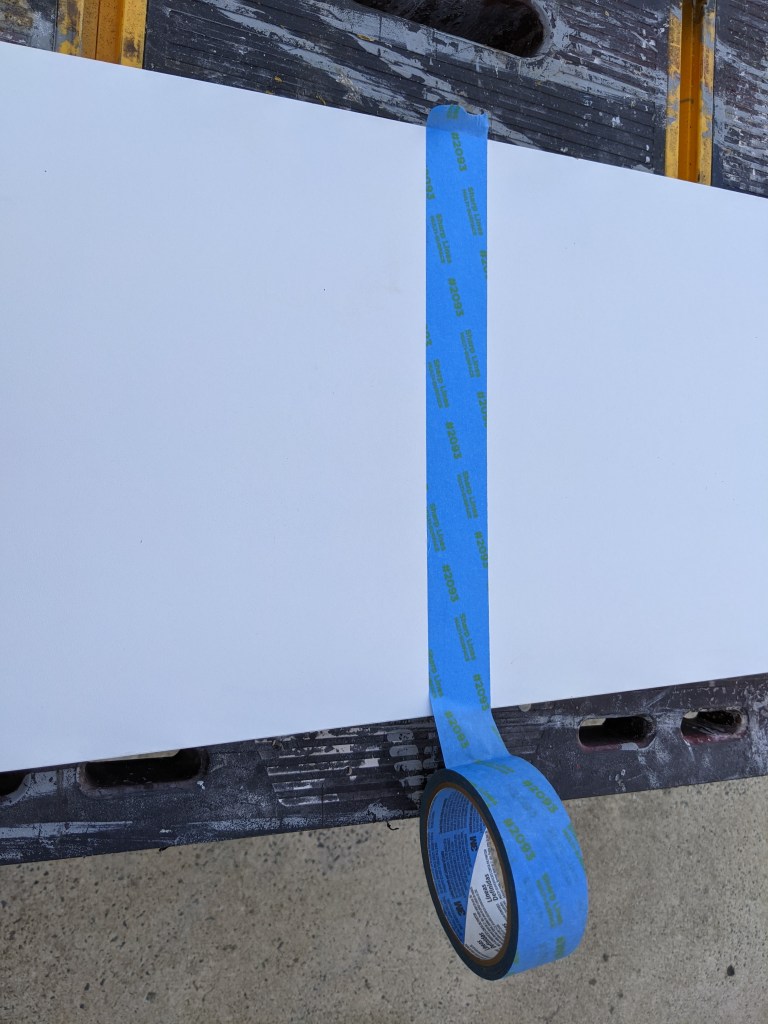
To my delight, we found melamine shelving that did not need to be painted- Yay! To me, that meant no sanding, painting, poly top coats or later repainting because of the inevitable scuffing. To the hubs, that meant trying to figure out what to use and how to cut it so it would not split or chip. Painter’s tape to the rescue! He’s a genius!
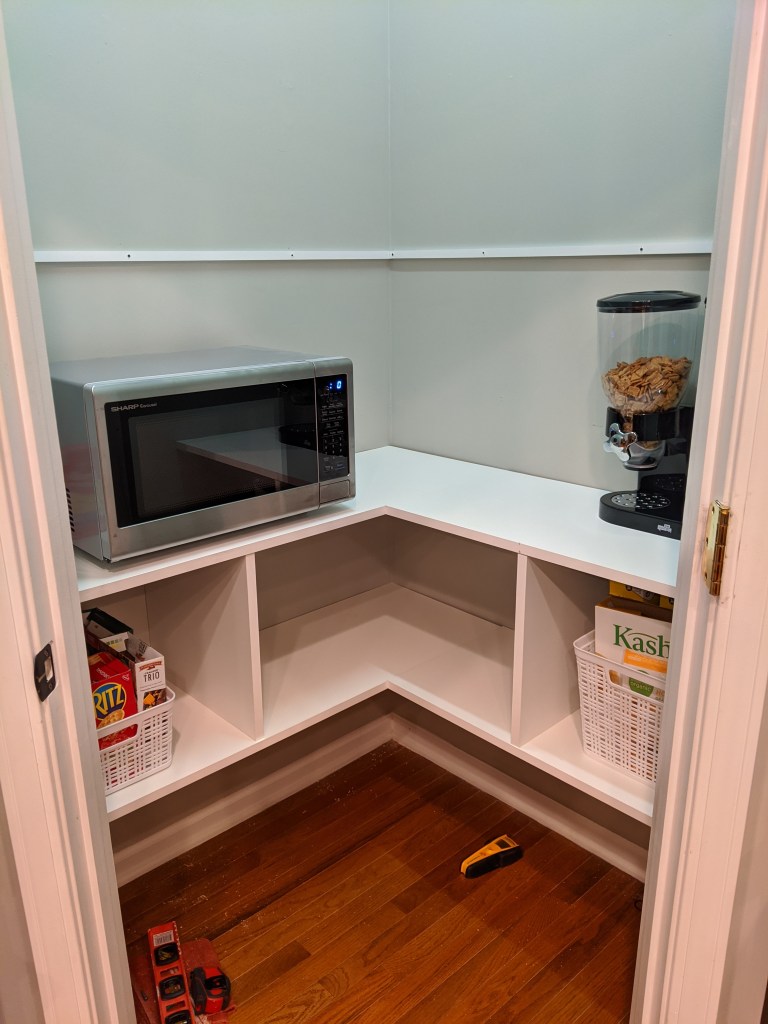
We (by “we” I mean my husband) created the “counter space” to accommodate the microwave by making the shelf wider- 16 inches from the wall. All the other shelves were 12 inches in width.
The big test…does the microwave fit? It DOES! Yay!
I love the compartments- they provide extra support and add to the “built in” look. Pictured above is the handy dandy tool needed to make the magic happen! Link at the end of post
Spacing- For all you visual people like me
Isn’t it dreamy? I’m thinking he read my mind quite well, what do you think? Let’s see if he can do that again come Christmas time 😉
Time to organize- man, do I love me some organization
ALL DONE- hahaha, I make myself laugh…done? Nope, not quite!
When we moved into our house, we had so many white doors. Guests in our home would walk into the pantry thinking they were headed out to the garage! We started looking for and found an old door on craigslist (why yes, we were ahead of our time with the old door turned pantry door). We painted that puppy blue and distressed it. It worked really well, that is, until the kitchen renovation. Now our super cool door stuck out like a sore thumb. The blue had to go. But what color? White? Ash like the cabinets? Finally, we decided to strip it down. Our thinking, it would incorporate another natural element to tie in with the shelves and kitchen table.
Sanding and stripping, sanding and stripping, it was a process, ya’llFusion’s natural hemp oil- can you say AWESOME stuff?
Voila! Almost!
Oh, and I didn’t want to be able to see into the pantry through the glass (I know, I know after all that hard work… Did I mention my husband is a very patient man?) I found looking glass spray and by using vinegar and a paper towel, I managed to achieve the distressed look that I was going for- Woohoo!
I love how our project within a project within a project turned out! And, we’ll see if we end up with a revolving door or maybe we will just get a lock!
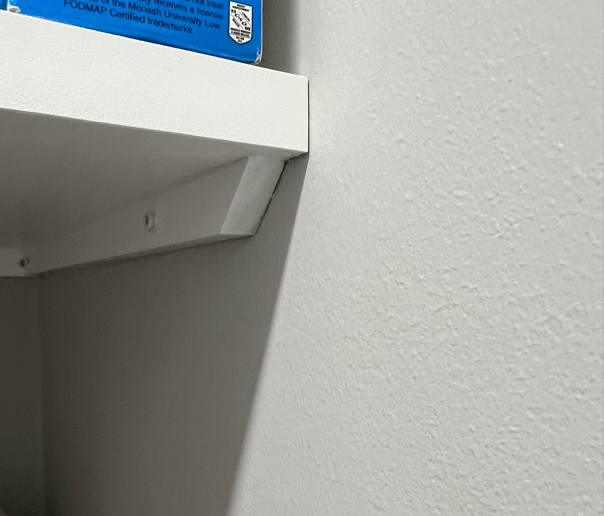
A few folks asked about how the shelves attach to the wall. The shelves do not directly attach to the wall. Instead, they sit on a ledge that wraps all the way around. A few pictures for those visual people like me 🙂
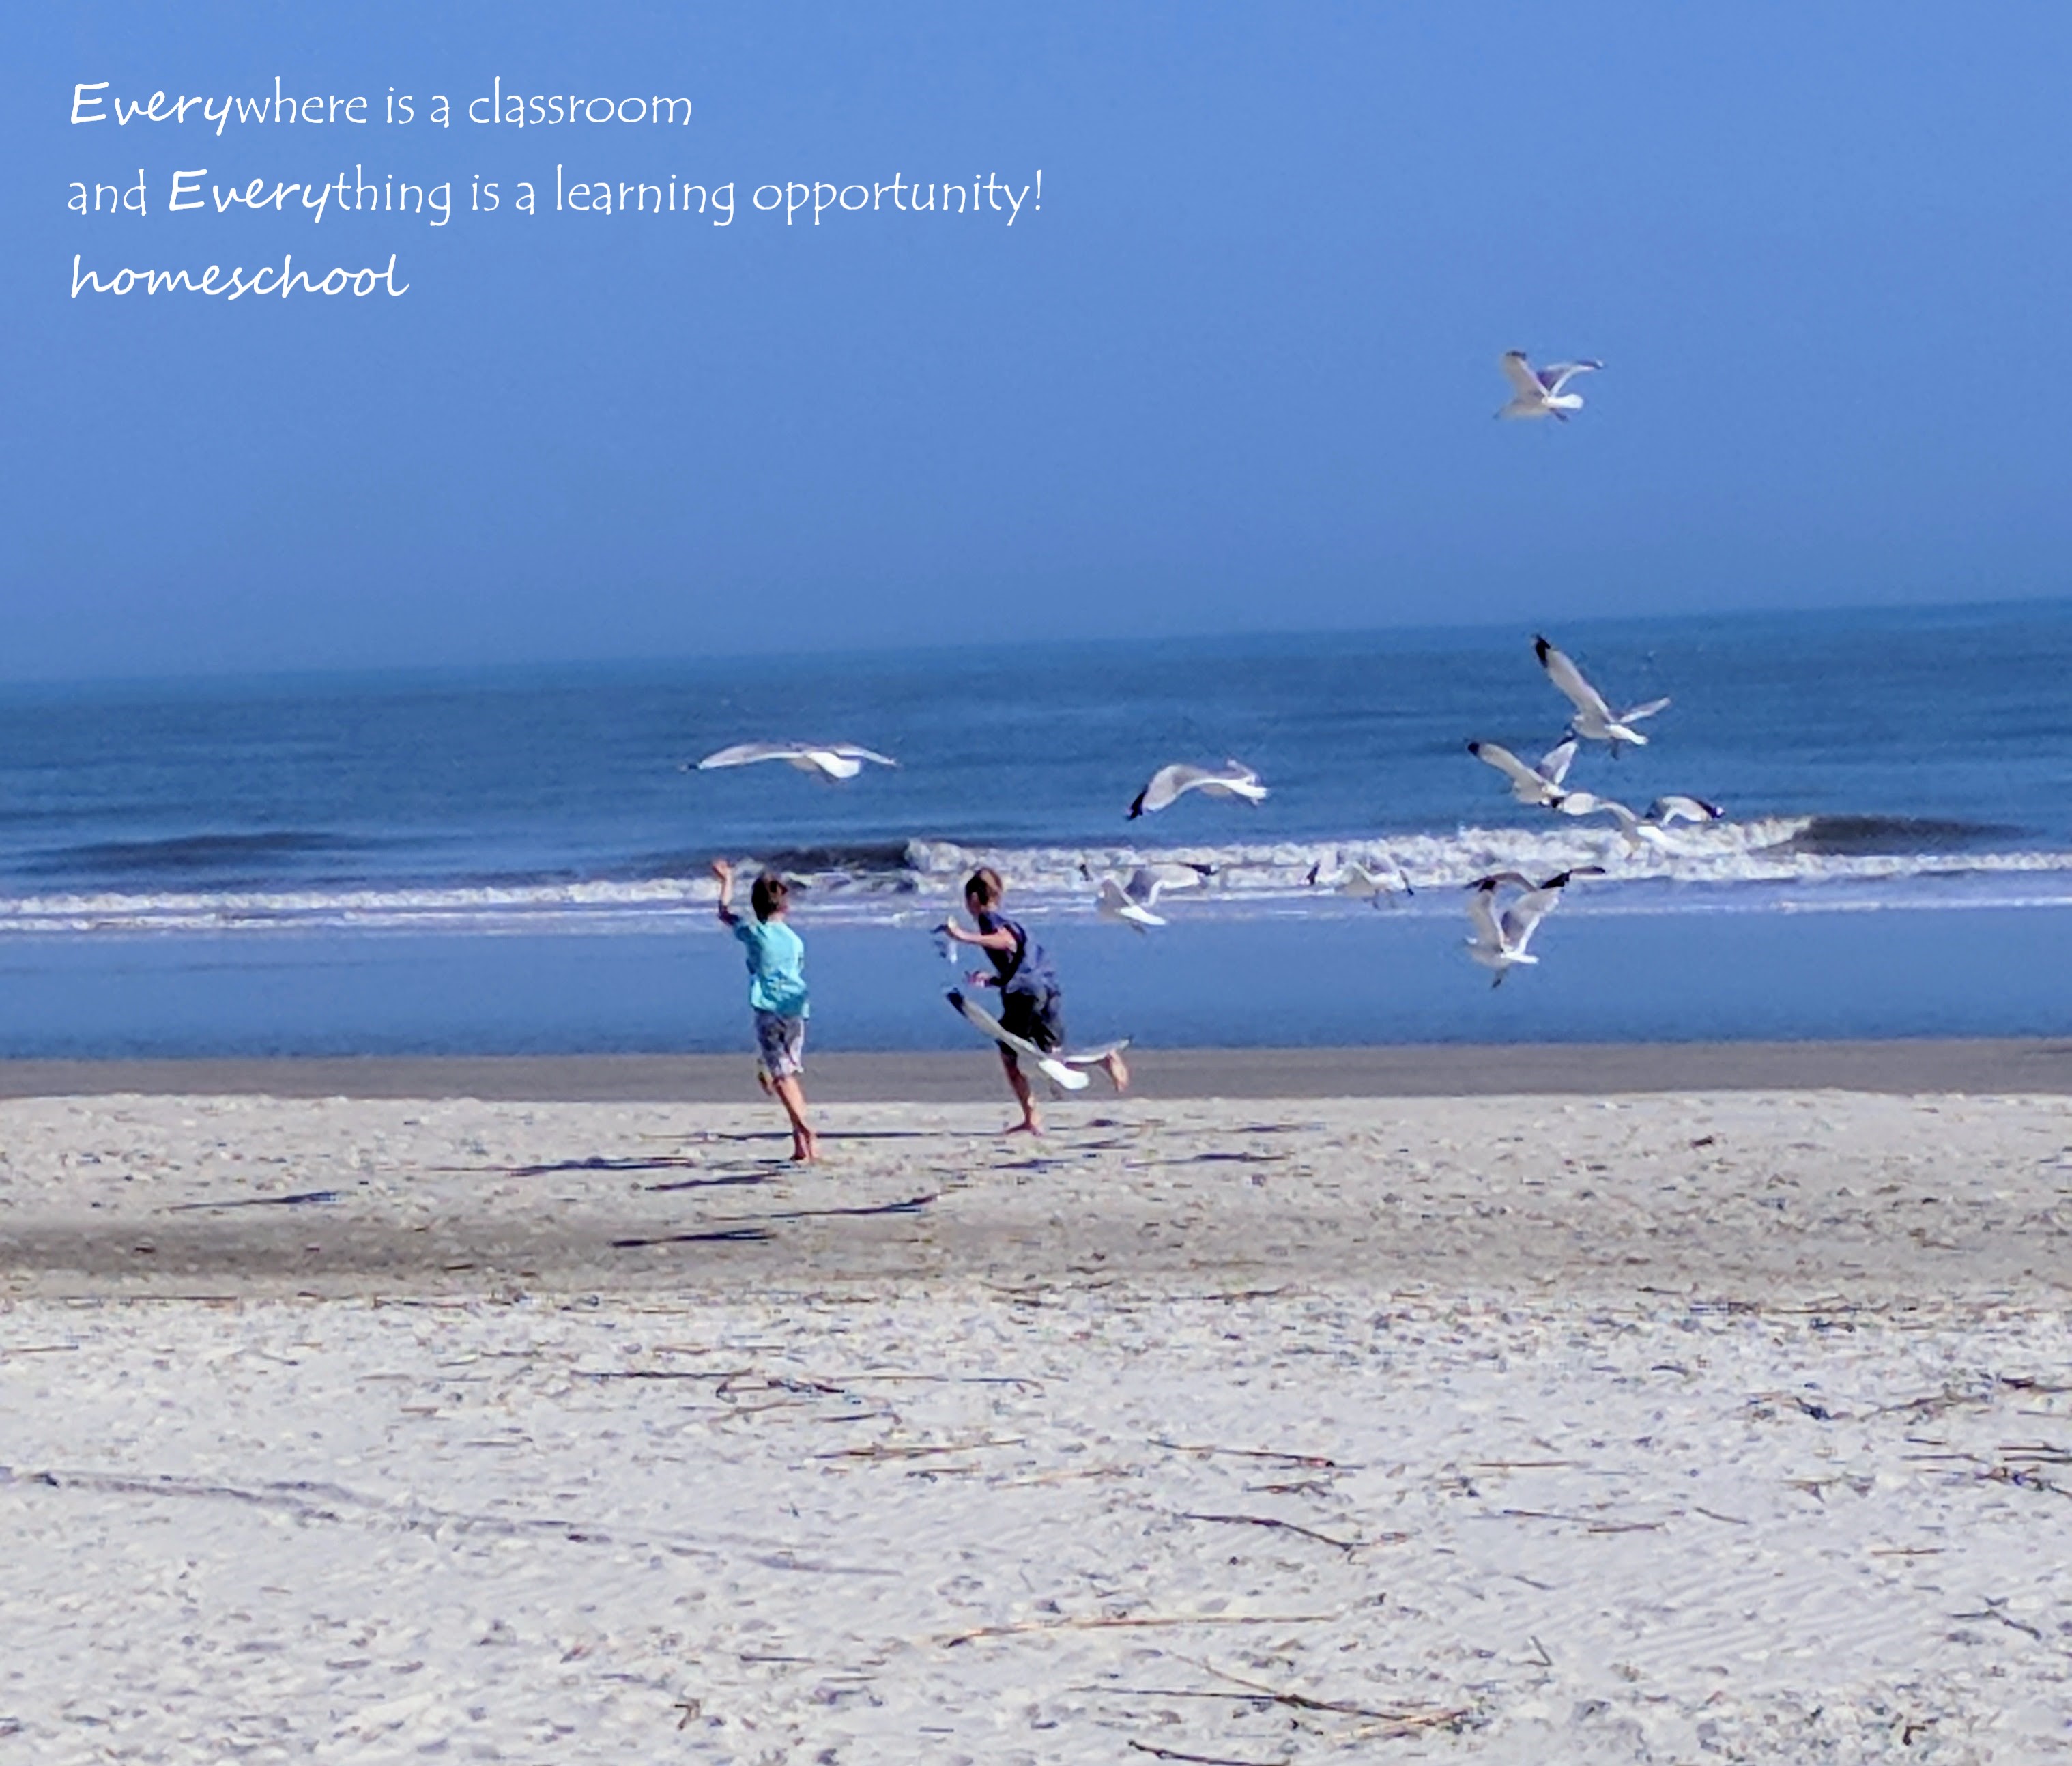
What do Albert Einstein, C.S. Lewis, and Serena and Venus Williams have in common?
If you guessed that they were all homeschooled, then you would be correct!
Have you ever thought of homeschooling?
Our family’s homeschool journey began over 6 years ago when my oldest son was in the first grade. He was attending classes in a traditional school environment. Every morning, Monday through Friday, my husband or I would drop off our bright-eyed boy and leave him in a noisy gym where he would wait for the teacher’s aide to take him to the classroom. Every afternoon, I’d join the long carpool line and inch along until I was able retrieve my 6 year old. He would climb in the car, completely exhausted. Ugh! It finally dawned on me that I was giving away the best part of his day.
What’s your WHY?
Why are you considering homeschooling? For our family, we wanted the freedom to learn outside the box, reclaim some of the day, and fill it with profitable learning experiences that would lead to a lifelong love of learning. What’s your “why”? Write it down! Go ahead, it only takes a minute. I will wait! It seems like such a small thing but I promise it will serve you in a big way at some point on your journey.
WHY this post?
The current pandemic has many families reevaluating schooling options. By offering some veteran homeschool mama insight, my thinking is that it might be what you need to consider taking the leap for yourself, especially if you have been seriously considering homeschooling. Imagine you and your child/children being liberated from zoom meetings, virtual PE, and a plethora of worksheets. You can already feel yourself relax, can’t you? It’s time to love learning again!
What about socialization?
If we have learned anything from the past few months, we have learned that we are social by nature- some of us more than others, of course. But what is socialization anyway? The word socialization by definition means; “the process of learning to behave in a way that is acceptable to society” (Oxford Languages). Well, I’m not sure about you but given the current state of society, I’m not convinced acceptable is really the goal I want to set for my children. Another definition of socialization: “the activity of mixing socially with others.” (Oxford Languages) Rest assured, homeschooling offers multiple opportunities for your child to not only “mix socially with others” but actually develop meaningful and lasting relationships with others.
What homeschooling is NOT
Homeschooling is not school at home. You aren’t recreating what is done within the four walls of one building into the four walls of your home. It isn’t a checklist of assignments (more on that later), a zoom call to log into, or endless worksheets to be completed and scanned in. In our early homeschooling years, I came across a quote by Steve and Jane Lambert that brought into focus what homeschooling truly is…
“We’re not trying to do “School at Home.” We’re trying to do homeschool. These are two entirely different propositions. We’re not trying to replicate the time, style of content of the classroom. Rather we’re trying to cultivate a lifestyle of learning in which learning takes place from morning until bedtime 7 days each week. The “formal” portion of each teaching day is just the tip of the iceberg.”–Steve & Jane Lambert
Homeschooling IS….
spending time with your favorite people!
learning together.
a front row seat for the light bulb moments.
fostering a love of learning.
time to breath.
freedom to choose what is best for your children not merely what is acceptable.
“Education is not the filling of a pail, but the lighting of a fire” – William Butler Yeats
Let’s get started!
First check your state to determine what is required for you to homeschool. Thankfully, in many states the requirements are few. In NC, where our family homeschools, the only requirements are to file a notice of intent online (the hardest part for me was to pick a name for our homeschool), keep a record of attendance (my kiddos joke, isn’t every day a school day?) and yearly testing (CAT test and Woodcock Johnson are a couple we have used) This website is user friendly and will serve as a good guide: https://hslda.org/legal
The Big Picture–Goals! Yay!
I highly recommend writing down individual goals for each child. It only takes 5 minutes- 10 minutes. Write what comes to your mind without overthinking it. You can even ask your children what they would like to work on. It is not an exhaustive list and it doesn’t have to be solely academic. Sometimes character training is just as important! Just 1 or 2 things to work on for the year. Here is our list for this year:
O (12 years old)- Hone/Refine writing skills, take more ownership of daily assignments, work on being tidy!
L (9 years old)- Master math facts, gain confidence with daily work, encourage and support independent reading time.
N- (5 years old)- develop reading skills, hold onto enthusiasm for learning
“Educating the mind without educating the heart is no education at all” –Aristotle
My practical tips
Lists! I love them! I’m not sure I could function without them (yes, plural- my husband jokes that my lists have lists- ha!) Being a list lover, my advice is to go ahead a make your list. Now, hold it loosely. I’m telling you, those days when you veer completely off course and don’t check a single thing off your list will be some of your best days! Lists can be wonderful tools but it’s important that we don’t give them more power than they deserve- we are in control of the list, the list doesn’t control us!
Speaking of lists, I created a daily assignment sheet (one for each kiddo) that I fill in with the target assignments for the week. My ultimate goal is to have each kiddo fill in what they want to do each day. With my oldest, this is helping him take ownership in planning out his week. If he wants a light day or a day off, then he can do extra assignments another day. See, what I did there? I circled back around to the big picture- encouraging my oldest to take initiative!
“I never teach my pupils, I only attempt to provide the conditions in which they can learn.”― Albert Einstein
The Three E’s
I often get asked how we get everything done every day. The short answer is we don’t. Maybe someone is struggling with a math concept or we are reading a really good book about the Revolutionary war that we just can’t put down. It could be that we just aren’t firing on all cylinders and need a light day or the day off. I’ve learned to give grace to myself and my children and do what we can do and no more. I use the 3 E’s principle- Essentials, Electives and Extras. If I can only pick one, we go with “Essentials” (reading, writing, arithmetic)
Essentials– *Reading, Writing, Math, Play!
Electives– Latin, Science, History, Geography
Extras– Art, Music, Typing
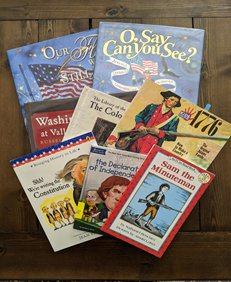
*Reading together is like a bomb diffusor in our home. I’m serious! It never ceases to amaze me how curling up on the couch with my kids and a book can restore the peace. A disagreement between siblings, a new concept that is a little challenging or just a few moments to refresh our spirits, reading aloud to my kiddos is like magic. I strategically leave books scattered around the house (To think I was once accused of being a neatnik- haha!). The picture below is a smattering of books currently on our coffee table. I love to watch them explore the materials I choose without being prompted. Even my 9 year old, who would prefer to play Legos, picked up a book this morning! Yay!
What about the hard days?
There is a joke in my house that I love sunshine and roses…I like happy, neat, and tidy! I really do, but I also know that hard days are part of life and I’d be remiss if I didn’t admit that there will be moments that you will really question why you wanted to homeschool in the first place. Remember when I said to write down your “why”? I’m telling you it will be your light on a stormy day. You’ve likely dealt with stormy days with traditional school- they come in the form of a bully, school safety concerns, and peer pressure.
Teaching from Rest
I also, highly recommend the book “Teaching from Rest” by Sarah Mackenzie. It is a small book and easy to read but there is so much good stuff packed in those pages. It will bless you! I try to read it at the beginning of each school year, it always proves to be refreshing and encouraging.
What are you waiting for?
So, if you have ever thought of homeschooling, I hope this post will serve as an encouragement to you. You can do it! Homeschooling has come a long way, even in the 6 years we have been homeschooling. There are some amazing resources out there, which is a great thing, but don’t get so overwhelmed by the choices. Trust that you will make the best decisions for your children and your family. Lastly, enjoy! It is a journey but a journey worth taking!
Sitting on the couch one evening, my husband says to me, “Have you ever thought of remodeling the kitchen ourselves? It took me a minute, ok a few minutes, to realize he was serious, and then respond with “Have you lost your mind?” To be fair, he hadn’t come up with the idea completely out of the blue. We’d spent a couple of years dreaming about updating our tired kitchen space.
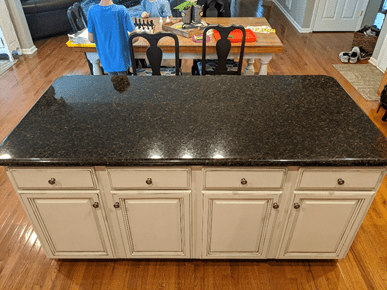
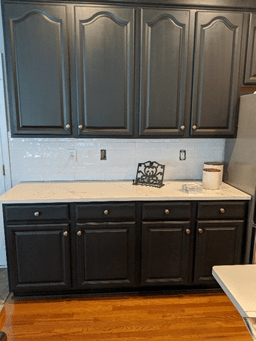
Initially, when we first started talking about renovating our kitchen, I thought an easy way to update and erase the orange vibe I was getting from this well-used area of our home was to simply paint the kitchen cabinets! Yay! Great idea! Bursting my bubble, my husband pointed out that the counter tops would need to be replaced as well. Then, it made sense to change the backsplash and if we were changing the backsplash, what if we removed the upper cabinets as well and did open shelving? YES, we thought….what a wonderful design we had come up with! And then the estimates started coming in from the contractors. WOW!
Thinking my kitchen dreams were dashed I resigned myself to the fact that I would just have to live with my orange kitchen a little while longer. That is, until, after a simple question “have you ever thought..?” and a tad bit of convincing, we decided to move full steam ahead and do it ourselves!
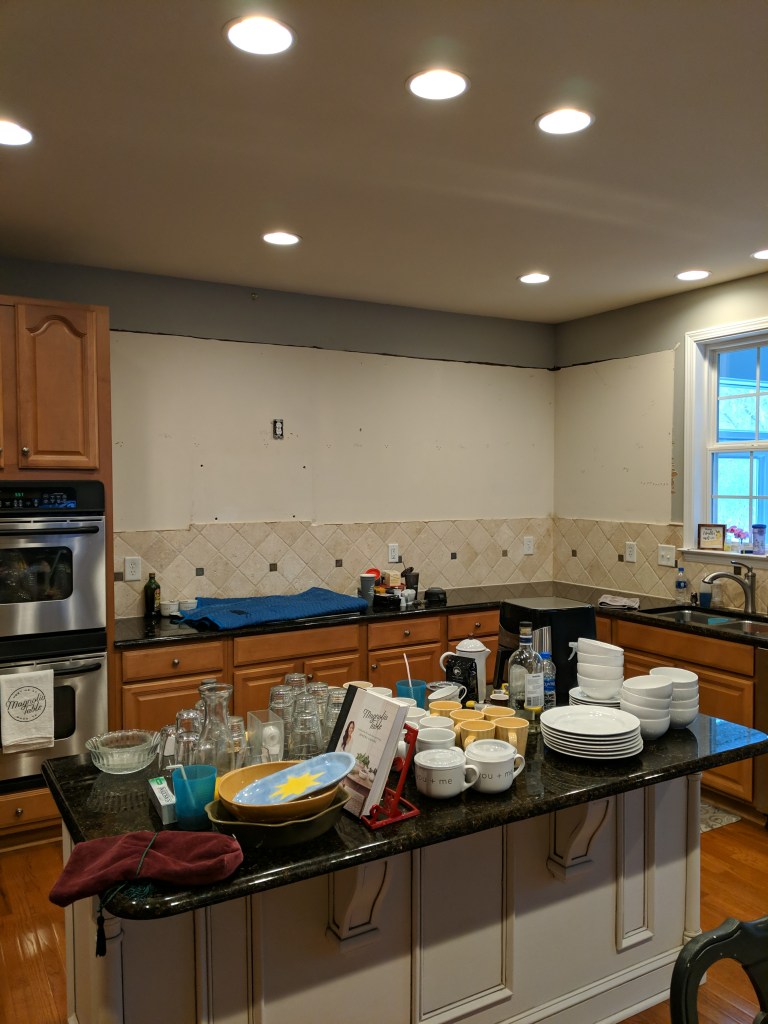
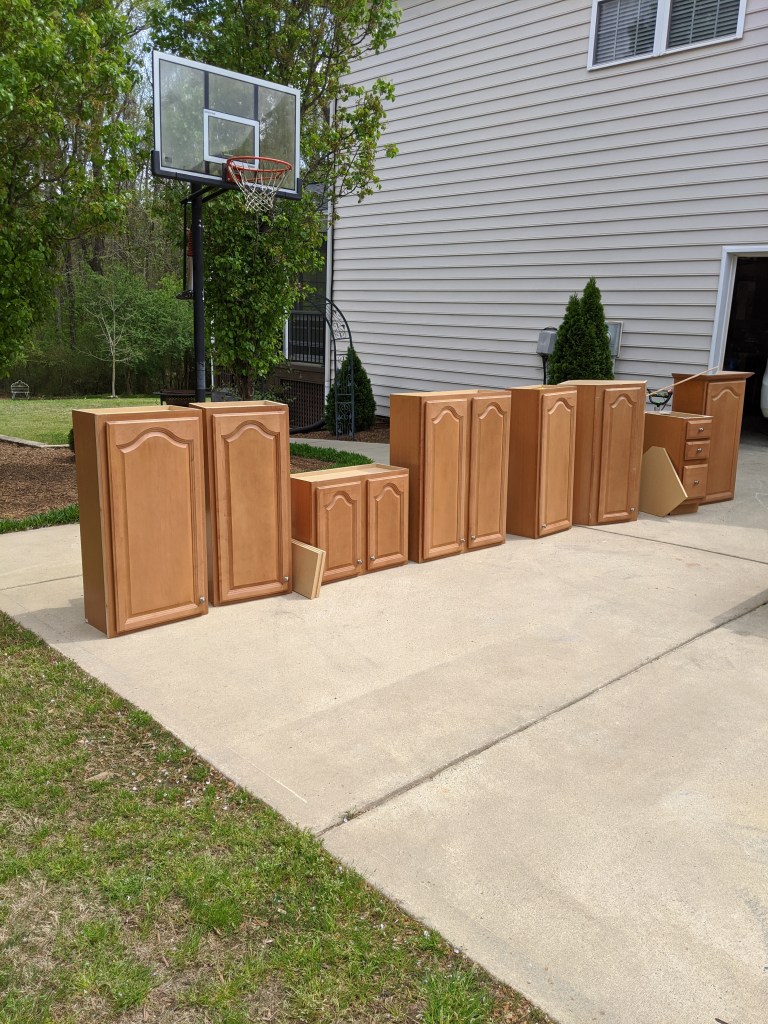
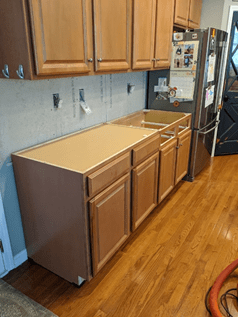
Buh Bye Upper cabinets! If I heard it once, I heard a million times, “Are you sure you want to remove your cabinets?!” and “What will you do with all of your stuff?” Believe me, we gave it careful thought and much consideration and I am soooo happy we ditched them. As for the STUFF? I didn’t need it! Christmas dishes I use once a year? I put them in the attic. Fifty two million coffee cups (ok, I am exaggerating a little BUT let’s just say it was enough that I will NEVER give someone a coffee cup for gift- EVER!) I donated them to a good cause! Turns out a lot of the stuff were things that I hadn’t touched in the 10+ years we’d called this place home! It felt so good to purge!
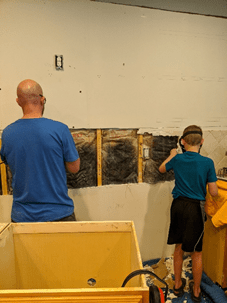
More demo! This was one of my favorite parts- the kiddos got involved and it turns out hammering your wall to bits is quite cathartic!
This very large piece of granite was super heavy. My husband, me, and two other guys removed this big hunk of rock without creating a large hole in the floor- Whew! We were so relieved and I felt like Wonder Woman!
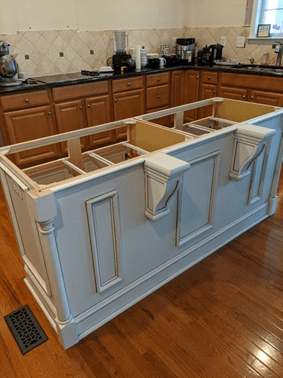
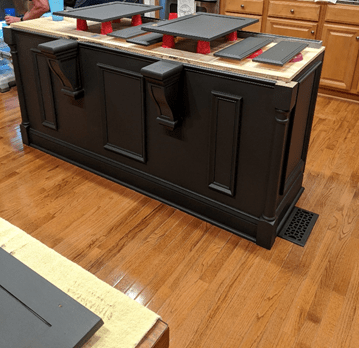
A little research led us to the cabinet maker for our cabinets so we ordered a new one to replace the desk that was in the kitchen. This has given us one large even counter space!
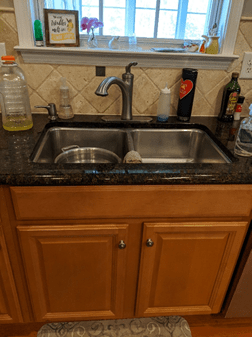
Modifying our existing cabinet and installing a farmhouse sink with a short apron front was our initial plan, but since we were already ordering a new cabinet to replace the desk, my husband had the idea to order a new cabinet for the sink as well so we could have a full size sink. Yippee! We are so glad we did- when we removed the old sink cabinet, it almost fell apart! A few years ago, we had a water leak from the dishwasher and the water had caused more damage than we thought. Had we installed the 150lb sink it would have been bad news!
Ta da! We found an amazing tool to support the farmhouse sink. It worked so well and the customer support was beyond amazing! I highly recommend Pete’s Sink Mount for your farmhouse sink install!
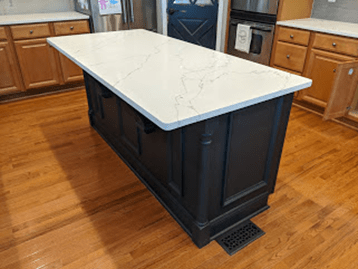
Visiting showroom after showroom trying to pick out quartz was super fun! Well, it was for my husband anyway. Not so much for an extremely indecisive person like myself. Who knew that there are 5 gazillion options and that I’m a gal that has champagne taste on a beer budget! Most of the show rooms have small sample sizes that don’t show the true look of the quartz. We ended up finding a place that was a showroom and fabricator all in one. Our salesperson was knowledgeable and patient. He walked us through a yard full of quartz and granite slabs and even showed us where the fabrication would take place. Through this process I learned I am a highly visual person, meaning I need to see it to believe it. East Coast Granite was superb from beginning to end, they helped me see it, believe it, and LOVE it!
While we waited for the quartz to be templated and installed, I began the first phase of cabinet painting (6 phases in all) A whole other post needs to be dedicated to that large but extremely gratifying process. Seriously ya’ll, if I can paint my cabinets, anyone can paint their cabinets and you can save a boatload of money. We received a quote for $4500 and we spent under $500- including the new knobs! Woohoo!
Simultaneously, as I was painting my little heart out, my husband repaired drywall, moved cabinets (did I mention we moved the entire back row of cabinets down so that the stove top would be centered?!) and installed the brackets for our floating butcher block shelves. He did an amazing job and has the patience of a saint- seriously, I would have given up a hundred times over, but not him. Thank goodness! I used Fusion’s food grade hemp oil on the shelves and they are perfect! Loved LOVED working with this stuff and I went on a mission to see what else I could put hemp oil on- more on that later!
Another change from the master plan was adding an extension with crown molding to our cabinets. Funny story and another “have you ever thought moment” was my husband asking me if I liked the space above the cabinets- “Nope, not at all” was my reply! It always got SO dusty. (A little tip for you: if you do have space above your cabinets, line them with wax paper. When you want to remove the grime and dust from above your cabinets, all you have to do is toss the wax paper and place a new piece- easy peasy!) This turned into quite a large project in the middle of quite a large project but we are so happy that we went this route.
Innovation at its finest! A car jack has many uses!All paint phases complete! Fusion mineral paint in Ash was the perfect color and exactly the look we were hoping for!
Doing everything ourselves, with the exception of the quartz countertops, was going very well. We could change things up as we went, we were learning a ton, and we could make everything just how we wanted it! Then, after completing the backsplash on the refrigerator wall we worried that doing the big wall- counter top to ceiling was a little over our heads- haha! So, we hired someone and I’ll just be nice and say it did NOT go well.
The portion of the backsplash we did ourselves! Yay!The portion of the backsplash we hired someone to do, had to live with for over a month until we could get someone else to remove the poorly installed grout and regrout. Not Yay!
With the tile and grout complete all we had to do was wait for our custom vent hood to be finished and delivered. And wait we did! Man, I am not good at being patient. Well, it finally came and after much planning…so much planning and WAITING! Me: “Can we hurry it up already?” My husband: “Sweetie, we are cutting a hole in the side of our house- it has to be perfect” Me (about 10 minutes later): “Are we ready to cut the hole in the side of the house now?” I’m really suprised we didn’t fight more during this whole process!
I can see the light! Finally- a hole in the side of the house!
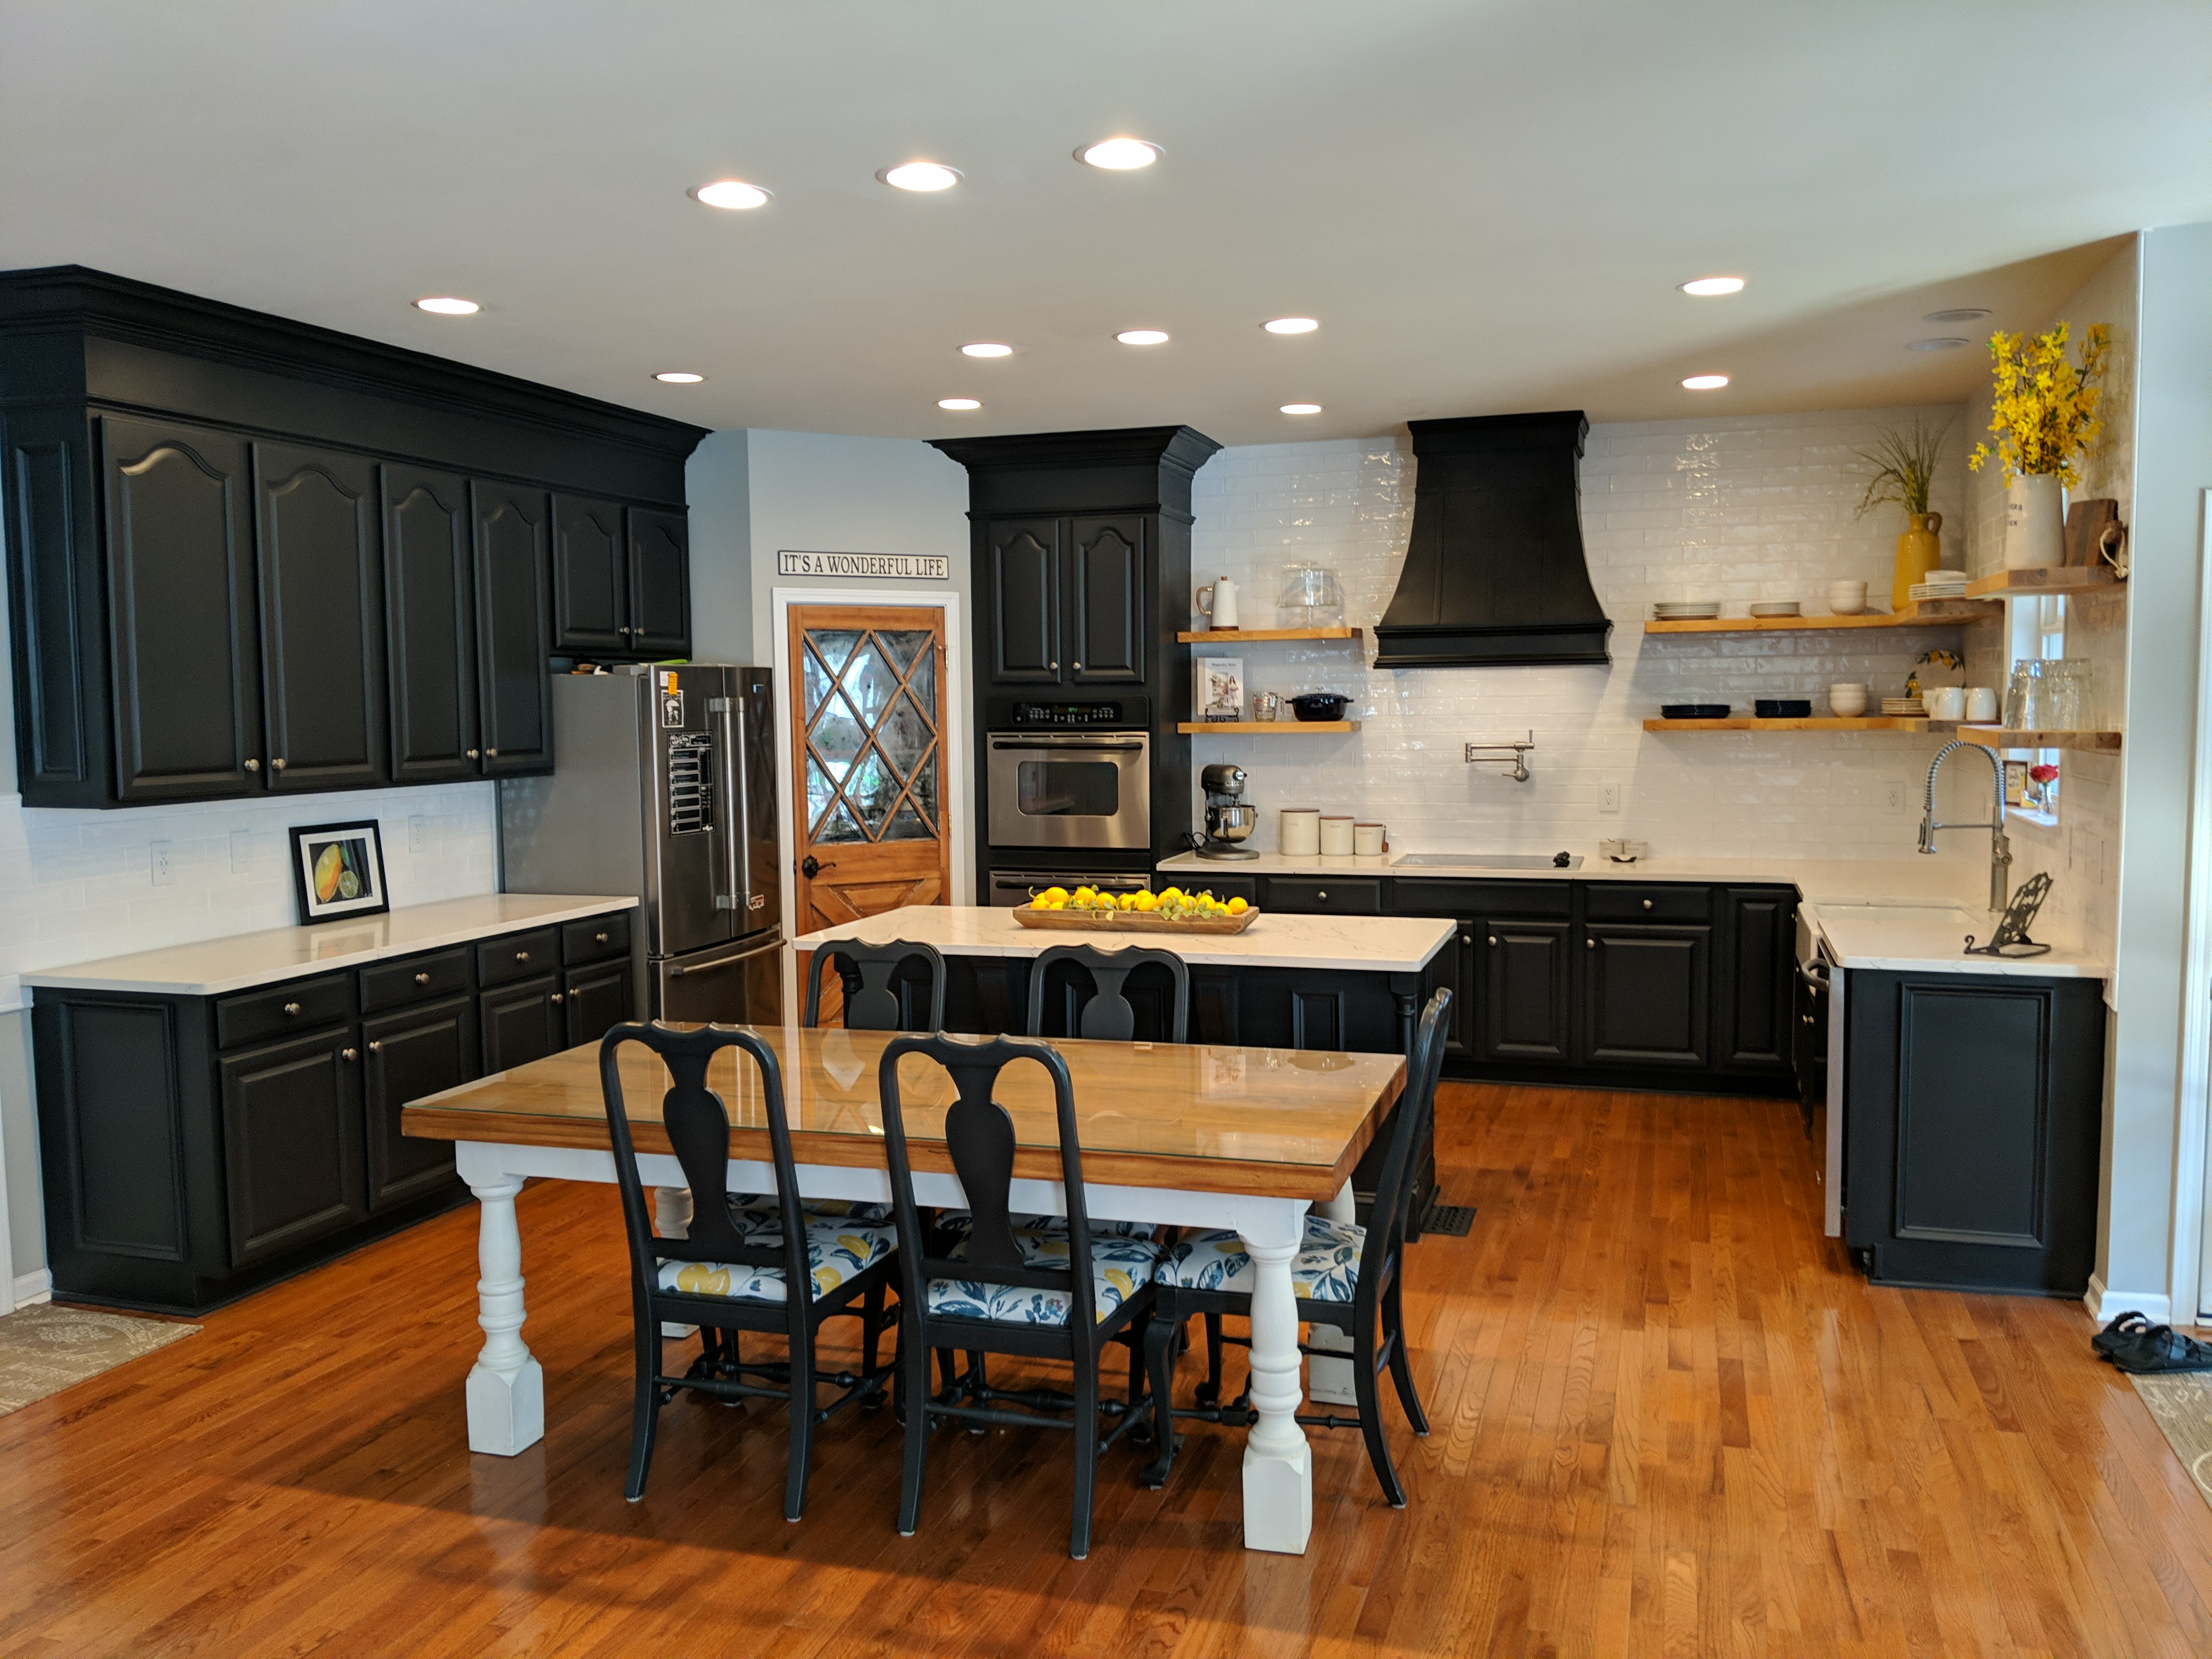
Our kitchen renovation journey began on March 15. A few mishaps and a pandemic later, our DIY kitchen reno was finally complete on September 12! Woohoo! We couldn’t be happier with the final result and all that we learned during the process- I’m still working on the whole patience thing 😉
See my pantry door- It might be one of my favorite things we did! We also revamped the pantry and I love it so much, I think it deserves it’s own post!